> ## Documentation Index
> Fetch the complete documentation index at: https://docs.examin8.com/llms.txt
> Use this file to discover all available pages before exploring further.
# Dynamic Mode
> In Dynamic Mode, you can select the desired chapters, and the paper will be generated automatically based on a predefined blueprint. The same blueprint can be reused with different chapter selections. In this mode, the chapter-wise weightage is distributed almost evenly.
### When should you use Dynamic Mode?
If you’re not particular about chapter-wise marks distribution and prefer a standard exam format, such as 40, 60, 80, or 100 marks papers, then **Dynamic Mode** is the right choice.
This mode is also helpful when you want to create an annual exam-style paper using only selected chapters. For example, if you want to make an 80-mark paper similar to CBSE board exams but with fewer chapters, **Dynamic Mode** is the best choice.
### How to Create Papers in Dynamic Mode?
Here are the steps to follow while creating a question paper in dynamic mode:
### Demo Videos:
All subjects: [https://www.youtube.com/shorts/zF0s-cDBjIo](https://www.youtube.com/shorts/zF0s-cDBjIo)
English: [https://www.youtube.com/shorts/wJzX6BcW76I](https://www.youtube.com/shorts/wJzX6BcW76I)
Hindi: [https://www.youtube.com/shorts/4wHM5XbR5eM](https://www.youtube.com/shorts/4wHM5XbR5eM)
### **Step 1: Create a New Paper**
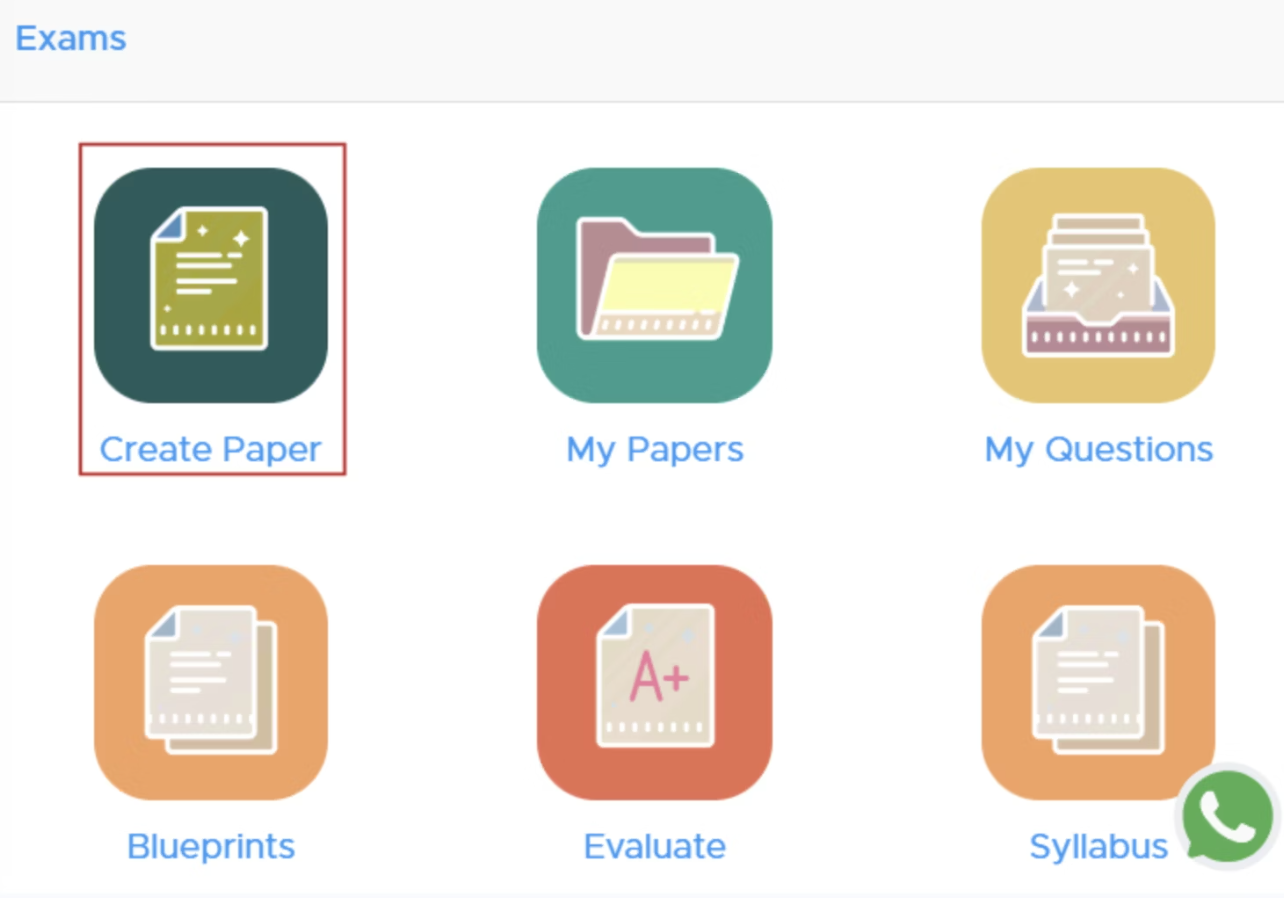
1. **Navigate to Exams**: Go to the **“Exams”** section.
2. **Select ‘Create Paper’**: Click on the **'Create Paper'** button. New users must [add the institute details](https://docs.examin8.com/getting-started) there to proceed.
 ### **Step 2: Select Class and Subject**
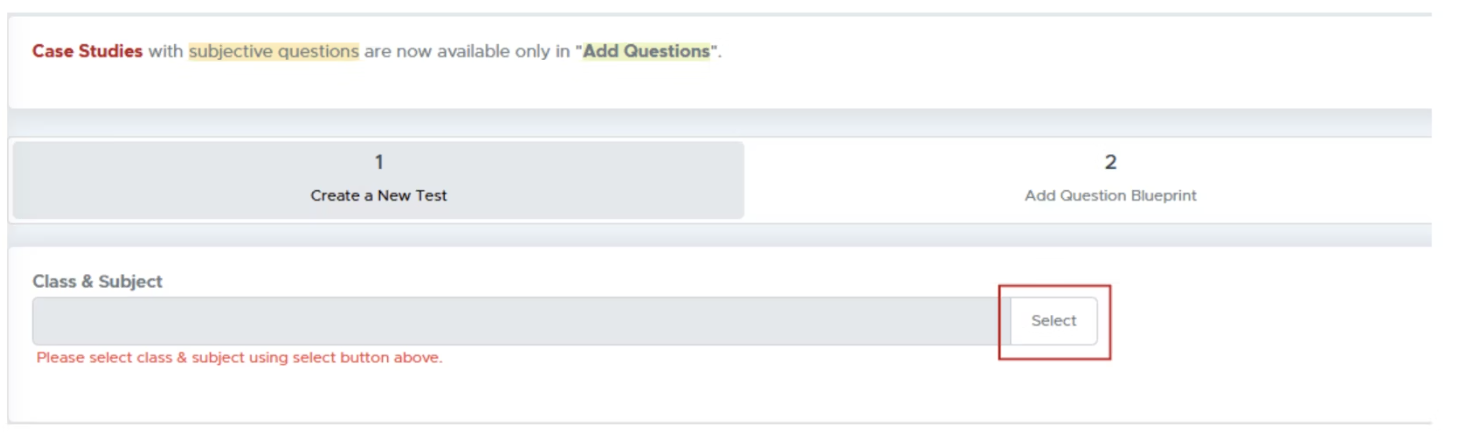
**Choose Class and Subject**: Click on the **“Select”** button to pick the class and subject for your test paper.
### **Step 2: Select Class and Subject**
**Choose Class and Subject**: Click on the **“Select”** button to pick the class and subject for your test paper.
 ### **Step 3: Specify Course and Subject**
1. **Module Selection**: Choose from available modules (e.g., CBSE, ICSE).
2. **Select Course**: Choose the relevant course for the test.
3. **Competitive Exams**: If applicable, select the specific exam type and whether to create a single or multiple-subject paper.
### **Step 3: Specify Course and Subject**
1. **Module Selection**: Choose from available modules (e.g., CBSE, ICSE).
2. **Select Course**: Choose the relevant course for the test.
3. **Competitive Exams**: If applicable, select the specific exam type and whether to create a single or multiple-subject paper.
 ### **Step 4: Configure Test Paper Settings**
1. **Source Selection**: Choose your question source as **All Questions** (only for premium users). If you are not getting this option, you need to [Buy Subscription](https://app.examin8.com/purchase-subscription) to access this feature.
2. **Test Paper Type**: Decide the format (Question Paper, Worksheet, etc.).
3. **Blueprint Mode**: Here, you must select **Dynamic Mode**
### **Step 4: Configure Test Paper Settings**
1. **Source Selection**: Choose your question source as **All Questions** (only for premium users). If you are not getting this option, you need to [Buy Subscription](https://app.examin8.com/purchase-subscription) to access this feature.
2. **Test Paper Type**: Decide the format (Question Paper, Worksheet, etc.).
3. **Blueprint Mode**: Here, you must select **Dynamic Mode**
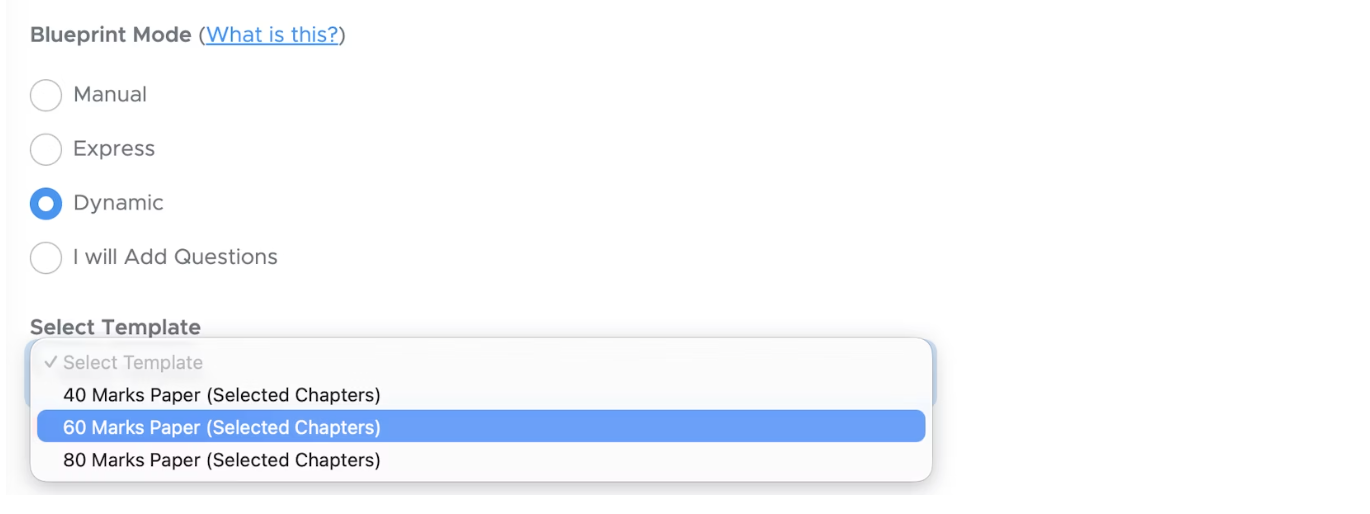 4. **Select Template**: Pick the template that aligns with your test objectives and requirements.
### **Step 5: Customize Paper Details**
1. **Select Header and Footer**: You can select the PDF header that you have already added there. You can also modify your logo and header/footer text by clicking the [edit header](https://app.examin8.com/header) link.
2. **Test Paper Name**: Enter a name for your question paper, such as *“Half Yearly Exam,” “Periodic Test - 1,”* or *“Annual Examination.”*
3. **Time Allowed**: Edit the duration for the question paper if required.
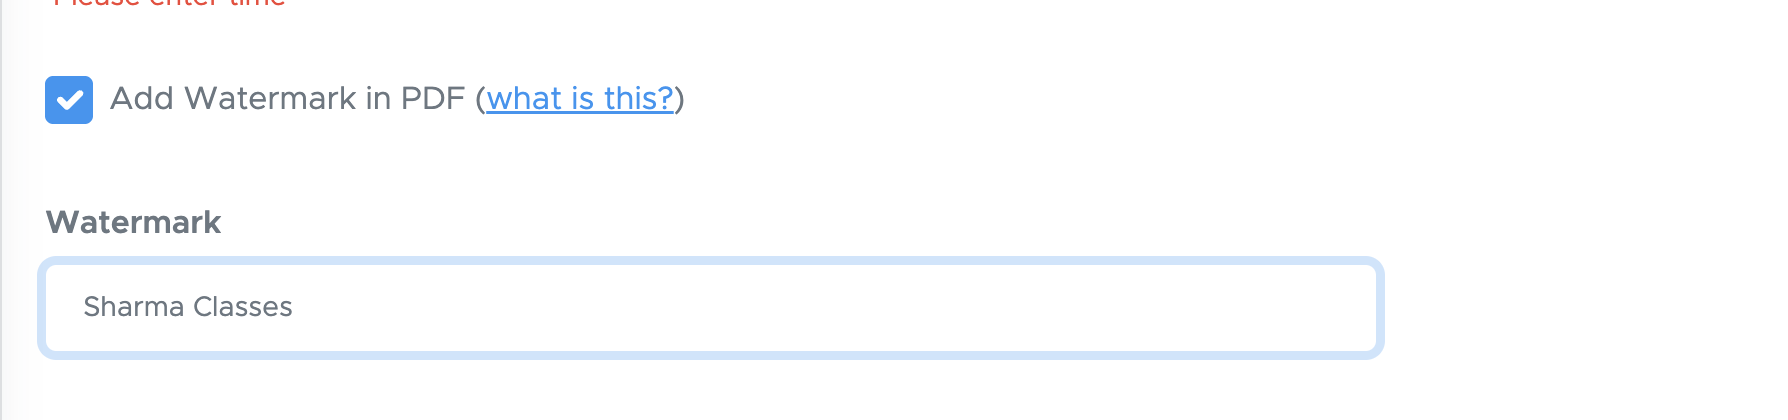
4. **Add Watermark (optional)**: If you would like to add a diagonal text watermark to your PDF files, choose to add a watermark. Generally, schools don't add a watermark to papers.
4. **Select Template**: Pick the template that aligns with your test objectives and requirements.
### **Step 5: Customize Paper Details**
1. **Select Header and Footer**: You can select the PDF header that you have already added there. You can also modify your logo and header/footer text by clicking the [edit header](https://app.examin8.com/header) link.
2. **Test Paper Name**: Enter a name for your question paper, such as *“Half Yearly Exam,” “Periodic Test - 1,”* or *“Annual Examination.”*
3. **Time Allowed**: Edit the duration for the question paper if required.
4. **Add Watermark (optional)**: If you would like to add a diagonal text watermark to your PDF files, choose to add a watermark. Generally, schools don't add a watermark to papers.
 5. **Show Marks:** If you don’t want marks to appear next to each question, uncheck the box. Otherwise, keep it checked.
6. **General Instructions**: Some default instructions are provided in Dynamic Mode. You can edit or delete them as needed.
7. Accept the **Terms of Use** checkbox and proceed by clicking **Next**.
### **Step 6: Final Review and Generation**
Click on **Refresh** to proceed. You will get a question paper with questions selected from our database. You can review them and then proceed to generate the paper. All the changes made in **Step 3** are saved automatically. If you leave the paper at this step and later return by clicking **RESUME** under **MY PAPERS**, all your previous changes will be restored automatically.
5. **Show Marks:** If you don’t want marks to appear next to each question, uncheck the box. Otherwise, keep it checked.
6. **General Instructions**: Some default instructions are provided in Dynamic Mode. You can edit or delete them as needed.
7. Accept the **Terms of Use** checkbox and proceed by clicking **Next**.
### **Step 6: Final Review and Generation**
Click on **Refresh** to proceed. You will get a question paper with questions selected from our database. You can review them and then proceed to generate the paper. All the changes made in **Step 3** are saved automatically. If you leave the paper at this step and later return by clicking **RESUME** under **MY PAPERS**, all your previous changes will be restored automatically.
 1. **Edit Section Name**: If needed, click the **edit** icon next to the section name to change or update the section title.
2. **Move Whole Section Up or Down**: Although it is rarely required in Dynamic mode yet you can use this option by clicking the down or up arrow placed beside the section name.
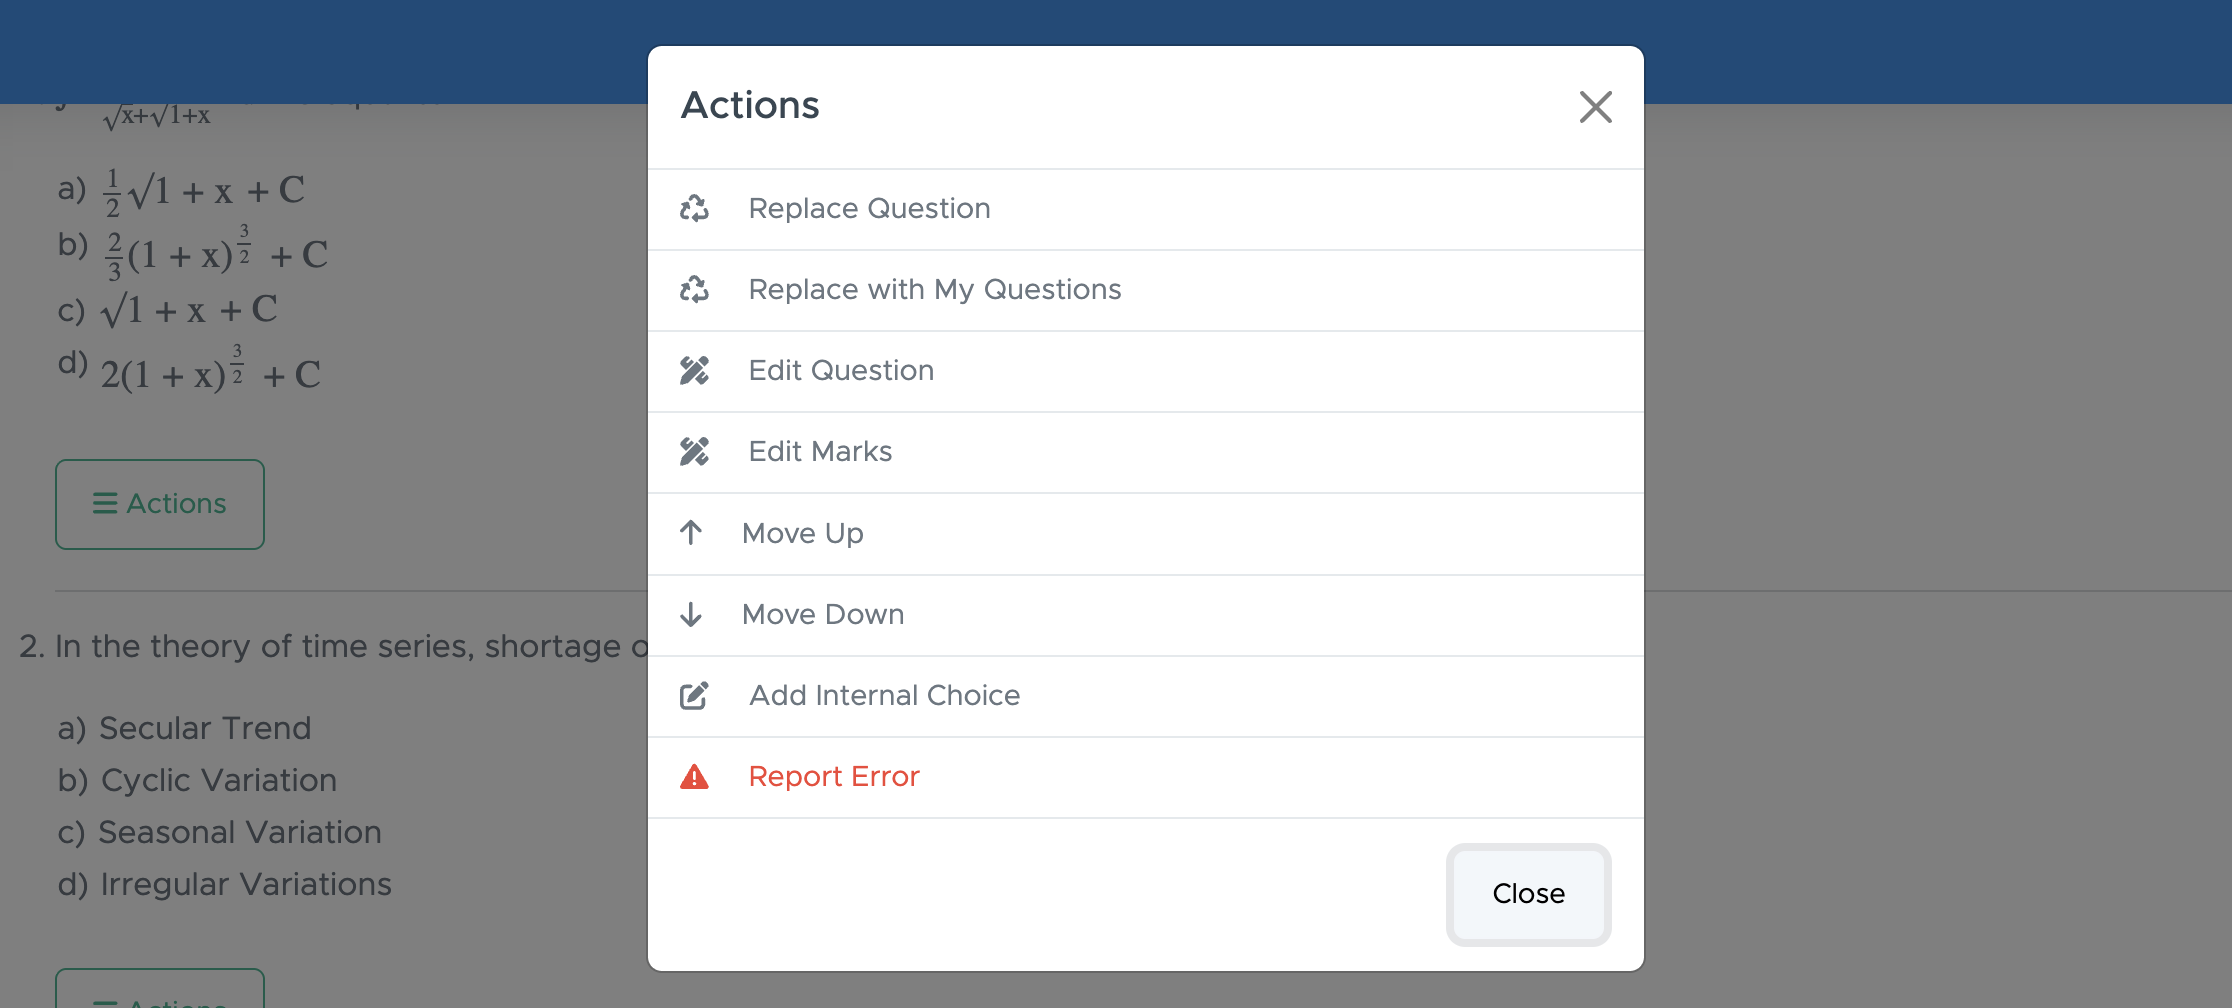
3. **Replace Question**: If you find a question that isn’t relevant, click the **Action** button below it and select **Replace Question**. You’ll see up to 30 alternative questions across 3 pages. Choose the one you prefer to replace the current question.
4. **Replace with My Question**: If you’ve already added your own questions in the test generator, click **Replace with My Questions** to choose a question from your personal list for replacement.
5. **Move Question Up or Down**: If you would like to move a question up or down, click or ACTIONS, then click move up or move down to change the placement of the question.
6. **Edit Question**: If you want to add your own question instead of the one provided, click **ACTIONS** and then select **Edit Question**. You can delete the existing question text and enter your own, or simply modify it as needed. You can also edit the options and solution from the same window.
7. **Edit Marks**: If required, you can click on ACTIONS, then click Edit Marks to change the marks.
8. **Add Internal Choice within Questions**: It is an **OR** between two questions. If you want to provide an internal choice between two questions, click on ACTIONS, then click "Add Internal Choice".
9. **Add Internal Choice within Sections**: This option works like the instruction *“Attempt any 5 questions from this section”* shown below a section title. To include such internal choices, check the box labelled **Add Internal Choice Within Sections** and specify how many questions students should attempt from that section. If all questions need to be attempted, simply leave the section field blank.
10. **Edit Testpaper Details**: On this screen, you can also change the question paper name, time allowed and general instructions.
11. **Print Preview**: Once the paper is generated, you won’t be able to edit any questions in the PDF file. That’s why **Step 3** includes a very useful feature — **Print Preview**.
1. **Edit Section Name**: If needed, click the **edit** icon next to the section name to change or update the section title.
2. **Move Whole Section Up or Down**: Although it is rarely required in Dynamic mode yet you can use this option by clicking the down or up arrow placed beside the section name.
3. **Replace Question**: If you find a question that isn’t relevant, click the **Action** button below it and select **Replace Question**. You’ll see up to 30 alternative questions across 3 pages. Choose the one you prefer to replace the current question.
4. **Replace with My Question**: If you’ve already added your own questions in the test generator, click **Replace with My Questions** to choose a question from your personal list for replacement.
5. **Move Question Up or Down**: If you would like to move a question up or down, click or ACTIONS, then click move up or move down to change the placement of the question.
6. **Edit Question**: If you want to add your own question instead of the one provided, click **ACTIONS** and then select **Edit Question**. You can delete the existing question text and enter your own, or simply modify it as needed. You can also edit the options and solution from the same window.
7. **Edit Marks**: If required, you can click on ACTIONS, then click Edit Marks to change the marks.
8. **Add Internal Choice within Questions**: It is an **OR** between two questions. If you want to provide an internal choice between two questions, click on ACTIONS, then click "Add Internal Choice".
9. **Add Internal Choice within Sections**: This option works like the instruction *“Attempt any 5 questions from this section”* shown below a section title. To include such internal choices, check the box labelled **Add Internal Choice Within Sections** and specify how many questions students should attempt from that section. If all questions need to be attempted, simply leave the section field blank.
10. **Edit Testpaper Details**: On this screen, you can also change the question paper name, time allowed and general instructions.
11. **Print Preview**: Once the paper is generated, you won’t be able to edit any questions in the PDF file. That’s why **Step 3** includes a very useful feature — **Print Preview**.
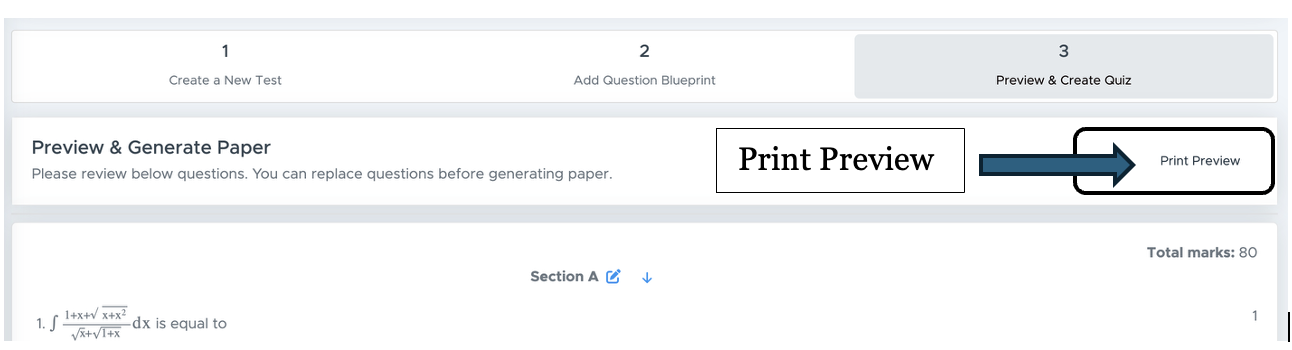 Click the **Print Preview** button at the top right, then select **PRINT**, and save the file as a PDF. You can share this draft with your school examination in-charge or the concerned person for review. After receiving their feedback, return to this page, make the suggested changes, and finally click **Generate Paper** to create the final PDF or Word file.
12. **Generate Paper**: Click **'Generate Paper'** to finalise your test paper.
### **Step 7: Download Your Test Paper**
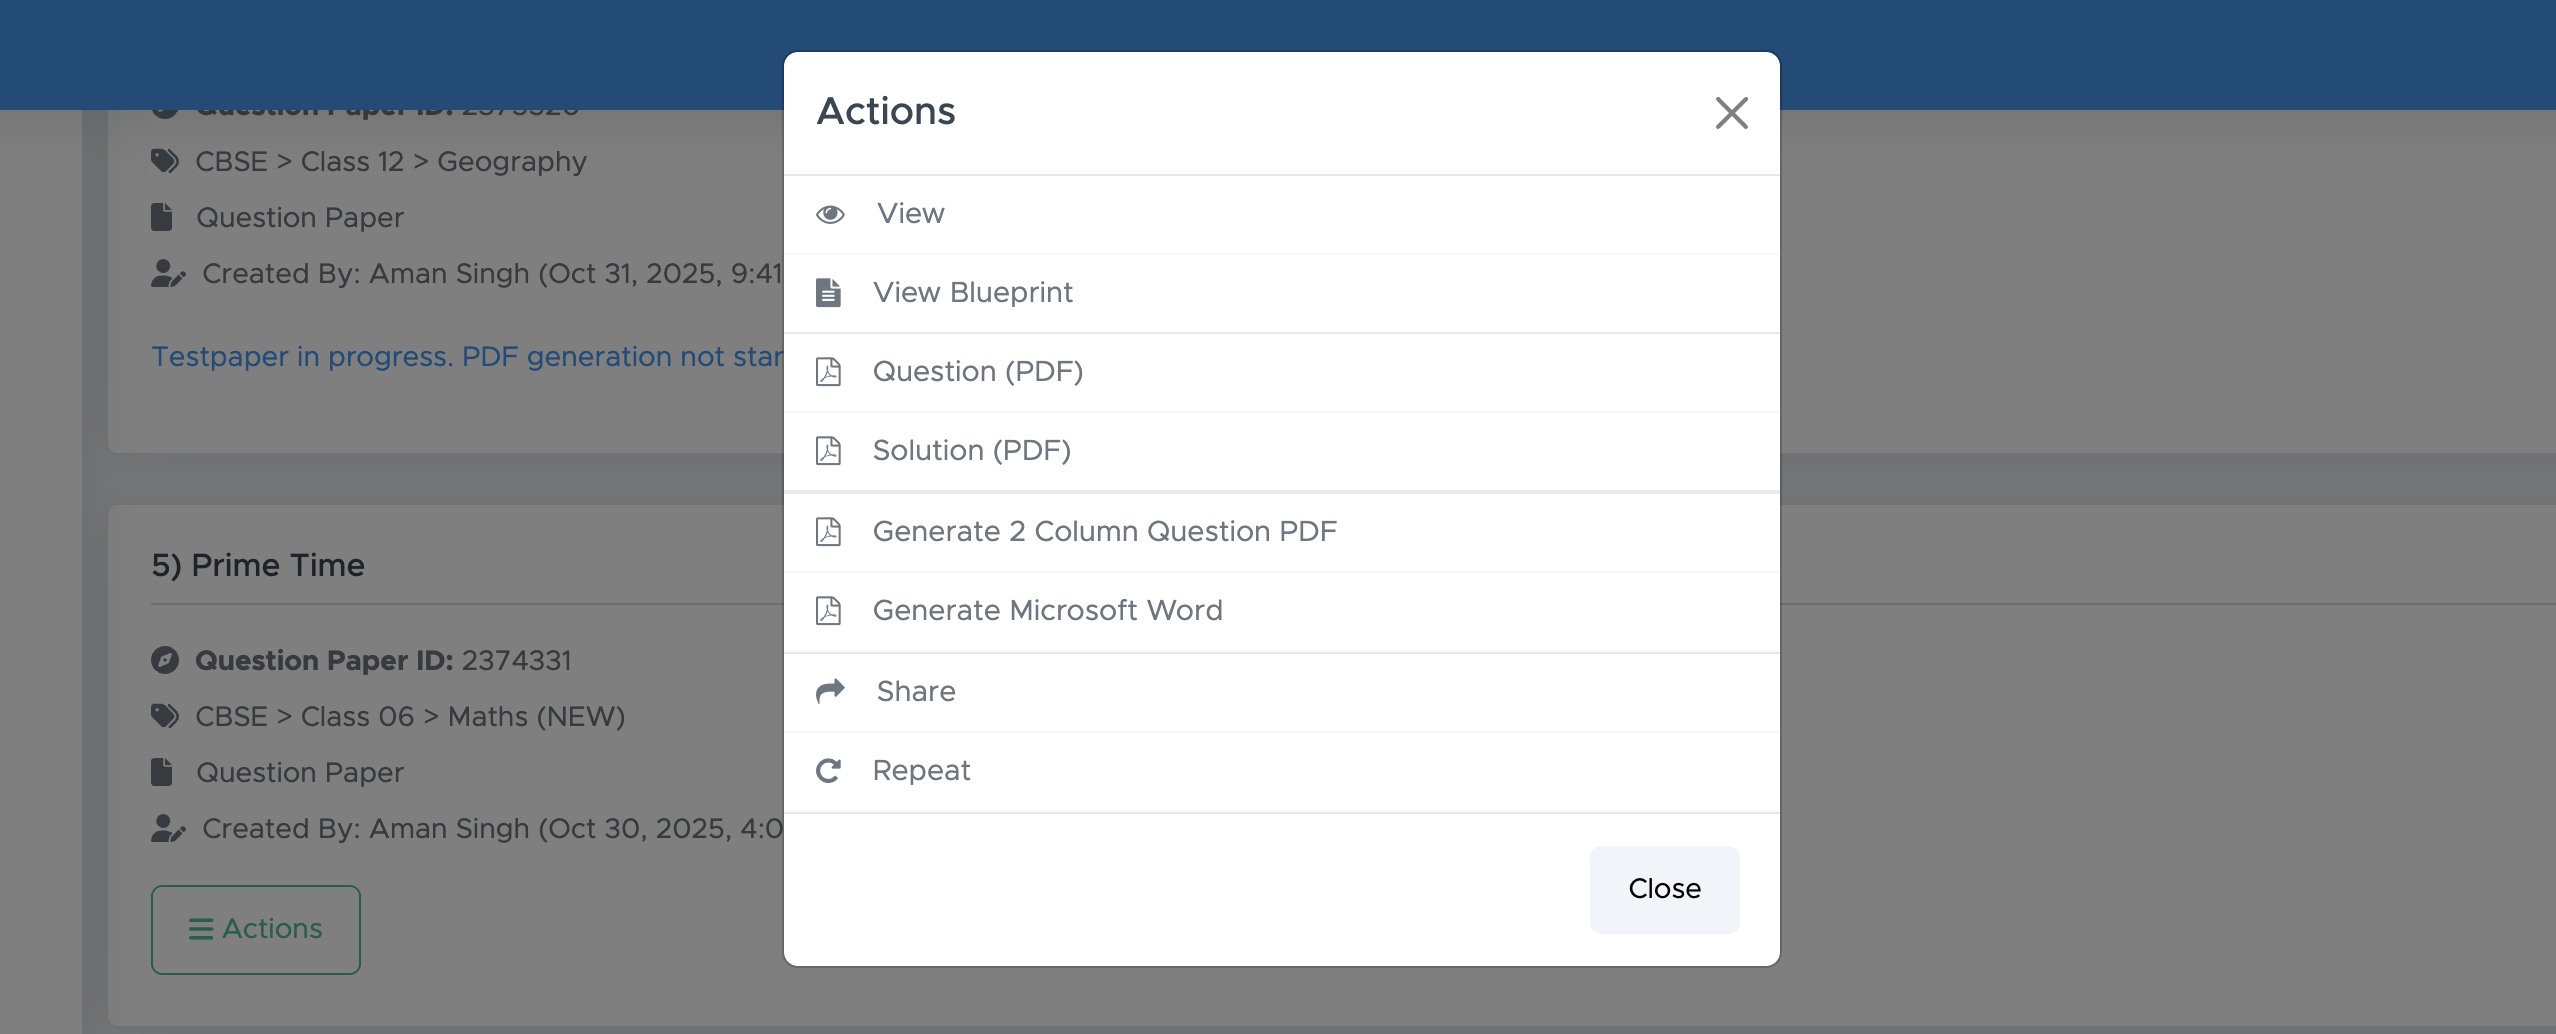
1. **Access Your Paper**: After generation, you’ll be directed to the **'My Paper'** page.
2. **Download Format**: Click the **Actions** button to download as .doc (Word) or .pdf.
Click the **Print Preview** button at the top right, then select **PRINT**, and save the file as a PDF. You can share this draft with your school examination in-charge or the concerned person for review. After receiving their feedback, return to this page, make the suggested changes, and finally click **Generate Paper** to create the final PDF or Word file.
12. **Generate Paper**: Click **'Generate Paper'** to finalise your test paper.
### **Step 7: Download Your Test Paper**
1. **Access Your Paper**: After generation, you’ll be directed to the **'My Paper'** page.
2. **Download Format**: Click the **Actions** button to download as .doc (Word) or .pdf.
 ## **FAQs**
### **1. What formats are supported for the logo?**
Supported formats include .jpg and .png.
### **2. Can I edit the test paper after generating it?**
No, you can’t edit a paper once it’s generated. However, you can create a copy of it by clicking **ACTIONS** and then **REPEAT**. This will let you make the desired changes in **Step 3**.
### **3. Is there a limit to the number of questions I can add?**
Yes, you can add up to **75 questions** (including optional ones) for school subjects. For **entrance** and **competitive exams**, the limit is **200 questions** per paper.
### **4. Can I create papers for competitive exams?**
Yes, Examin8 supports papers for various competitive exams.
## **Contact Support**
For assistance, please reach out to our support team:
* **Email**: [contact@examin8.com](mailto:contact@examin8.com)
* **Phone**: +91-9213522769, +91-8448425258
## **FAQs**
### **1. What formats are supported for the logo?**
Supported formats include .jpg and .png.
### **2. Can I edit the test paper after generating it?**
No, you can’t edit a paper once it’s generated. However, you can create a copy of it by clicking **ACTIONS** and then **REPEAT**. This will let you make the desired changes in **Step 3**.
### **3. Is there a limit to the number of questions I can add?**
Yes, you can add up to **75 questions** (including optional ones) for school subjects. For **entrance** and **competitive exams**, the limit is **200 questions** per paper.
### **4. Can I create papers for competitive exams?**
Yes, Examin8 supports papers for various competitive exams.
## **Contact Support**
For assistance, please reach out to our support team:
* **Email**: [contact@examin8.com](mailto:contact@examin8.com)
* **Phone**: +91-9213522769, +91-8448425258