> ## Documentation Index
> Fetch the complete documentation index at: https://docs.examin8.com/llms.txt
> Use this file to discover all available pages before exploring further.
# PYQ Mode
> If you want to generate a previous year’s question paper in PDF or online test format with your name and logo, you should select this blueprint mode.
### Step 1: Create a New Paper
1. **Navigate to Exams**: Go to the **“Exams”** section
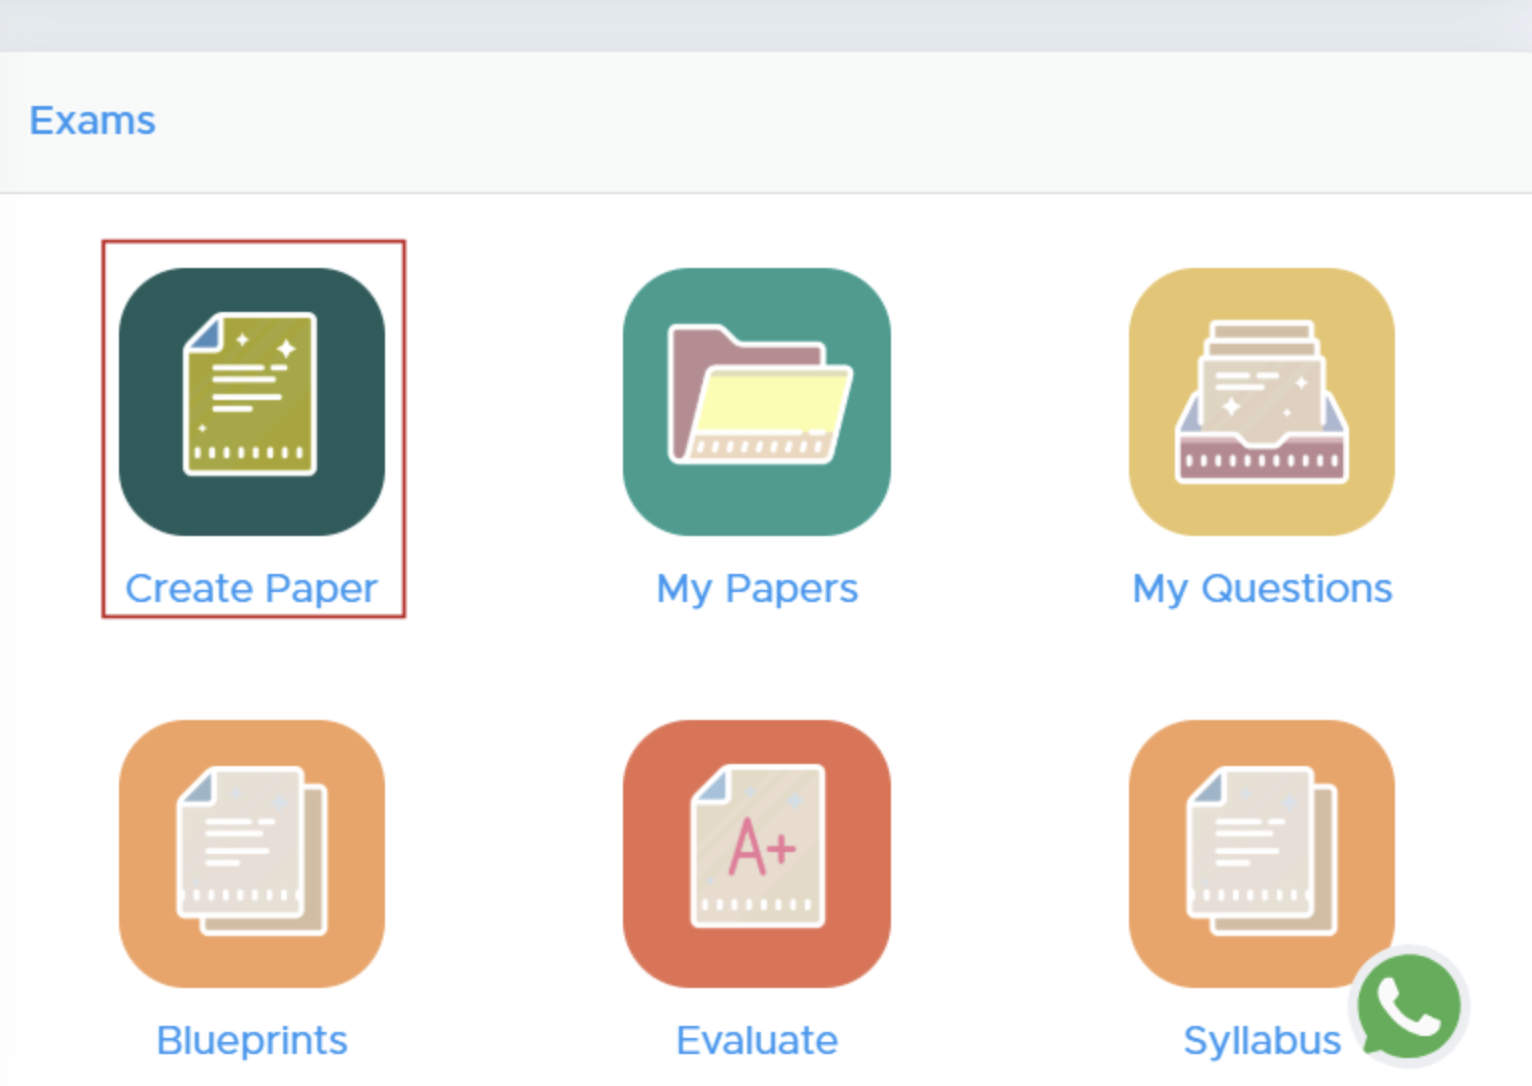 2. **Select ‘Create Paper’**: Click on the **'Create Paper'** button.
### Step 2: Select Class and Subject
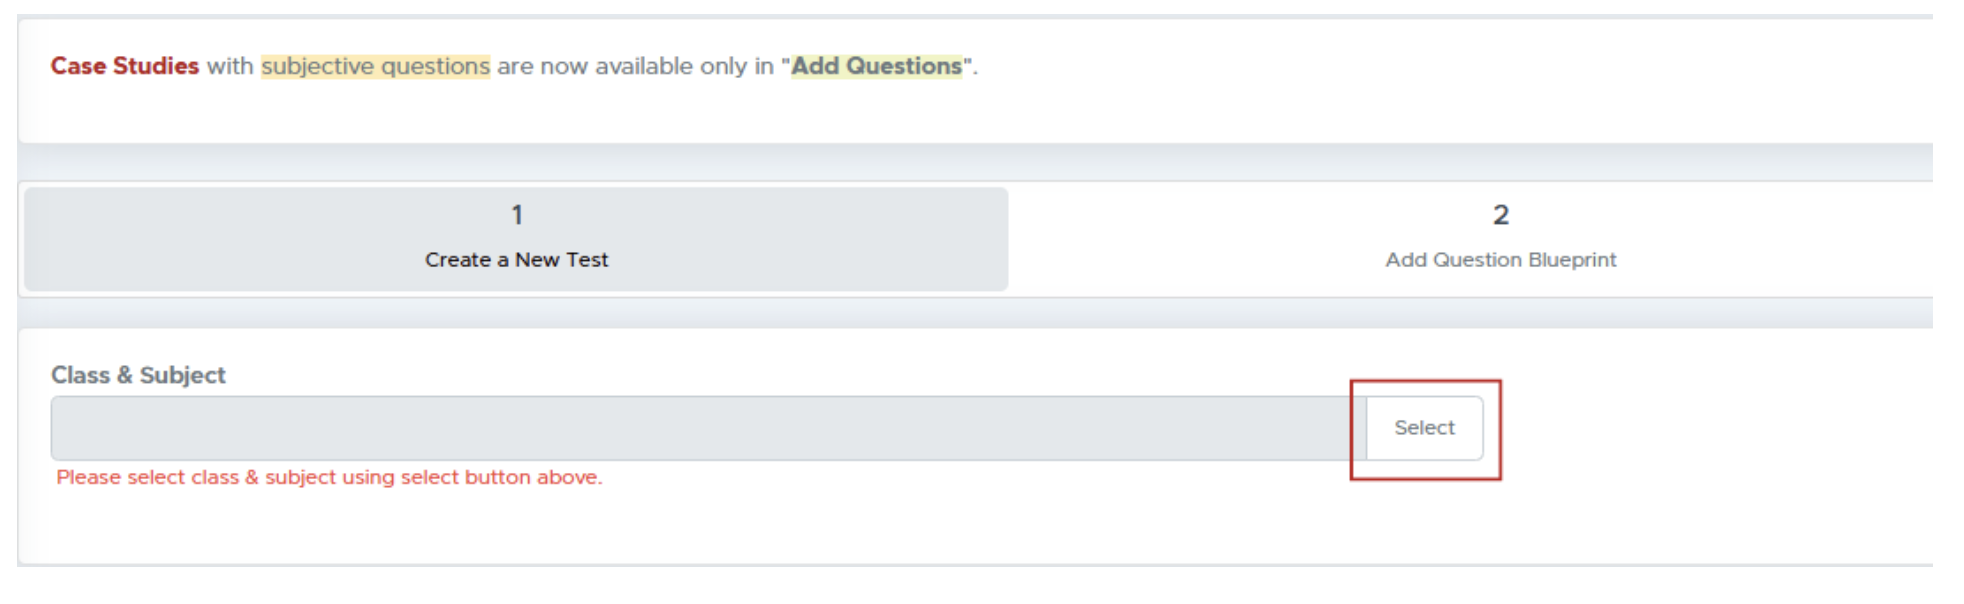
1. **Choose Class and Subject**: Click on the **“Select”** button to pick the class and subject for your test paper.
2. **Select ‘Create Paper’**: Click on the **'Create Paper'** button.
### Step 2: Select Class and Subject
1. **Choose Class and Subject**: Click on the **“Select”** button to pick the class and subject for your test paper.
 ### Step 3: Specify Course and Subject
1. **Module Selection**: Choose from available modules (e.g., CBSE, ICSE, Entrance Exam etc).
2. **Select Course**: Choose the relevant course for the test.
3. **Competitive Exams**: If applicable, select the specific exam type and whether to create a single or multiple-subject paper. To get the PYQ papers of JEE and NEET, you must select the Multiple Subjects option there.
### Step 4: Configure Test Paper Settings
1. **Source Selection**: Choose your question source as All Questions.
2. **Test Paper Type**: Decide the format as Question Paper or Online Test.
3. **Blueprint Mode**: Select blueprint mode as "**Previous Year Paper**".
### Step 5: Customize Paper Details
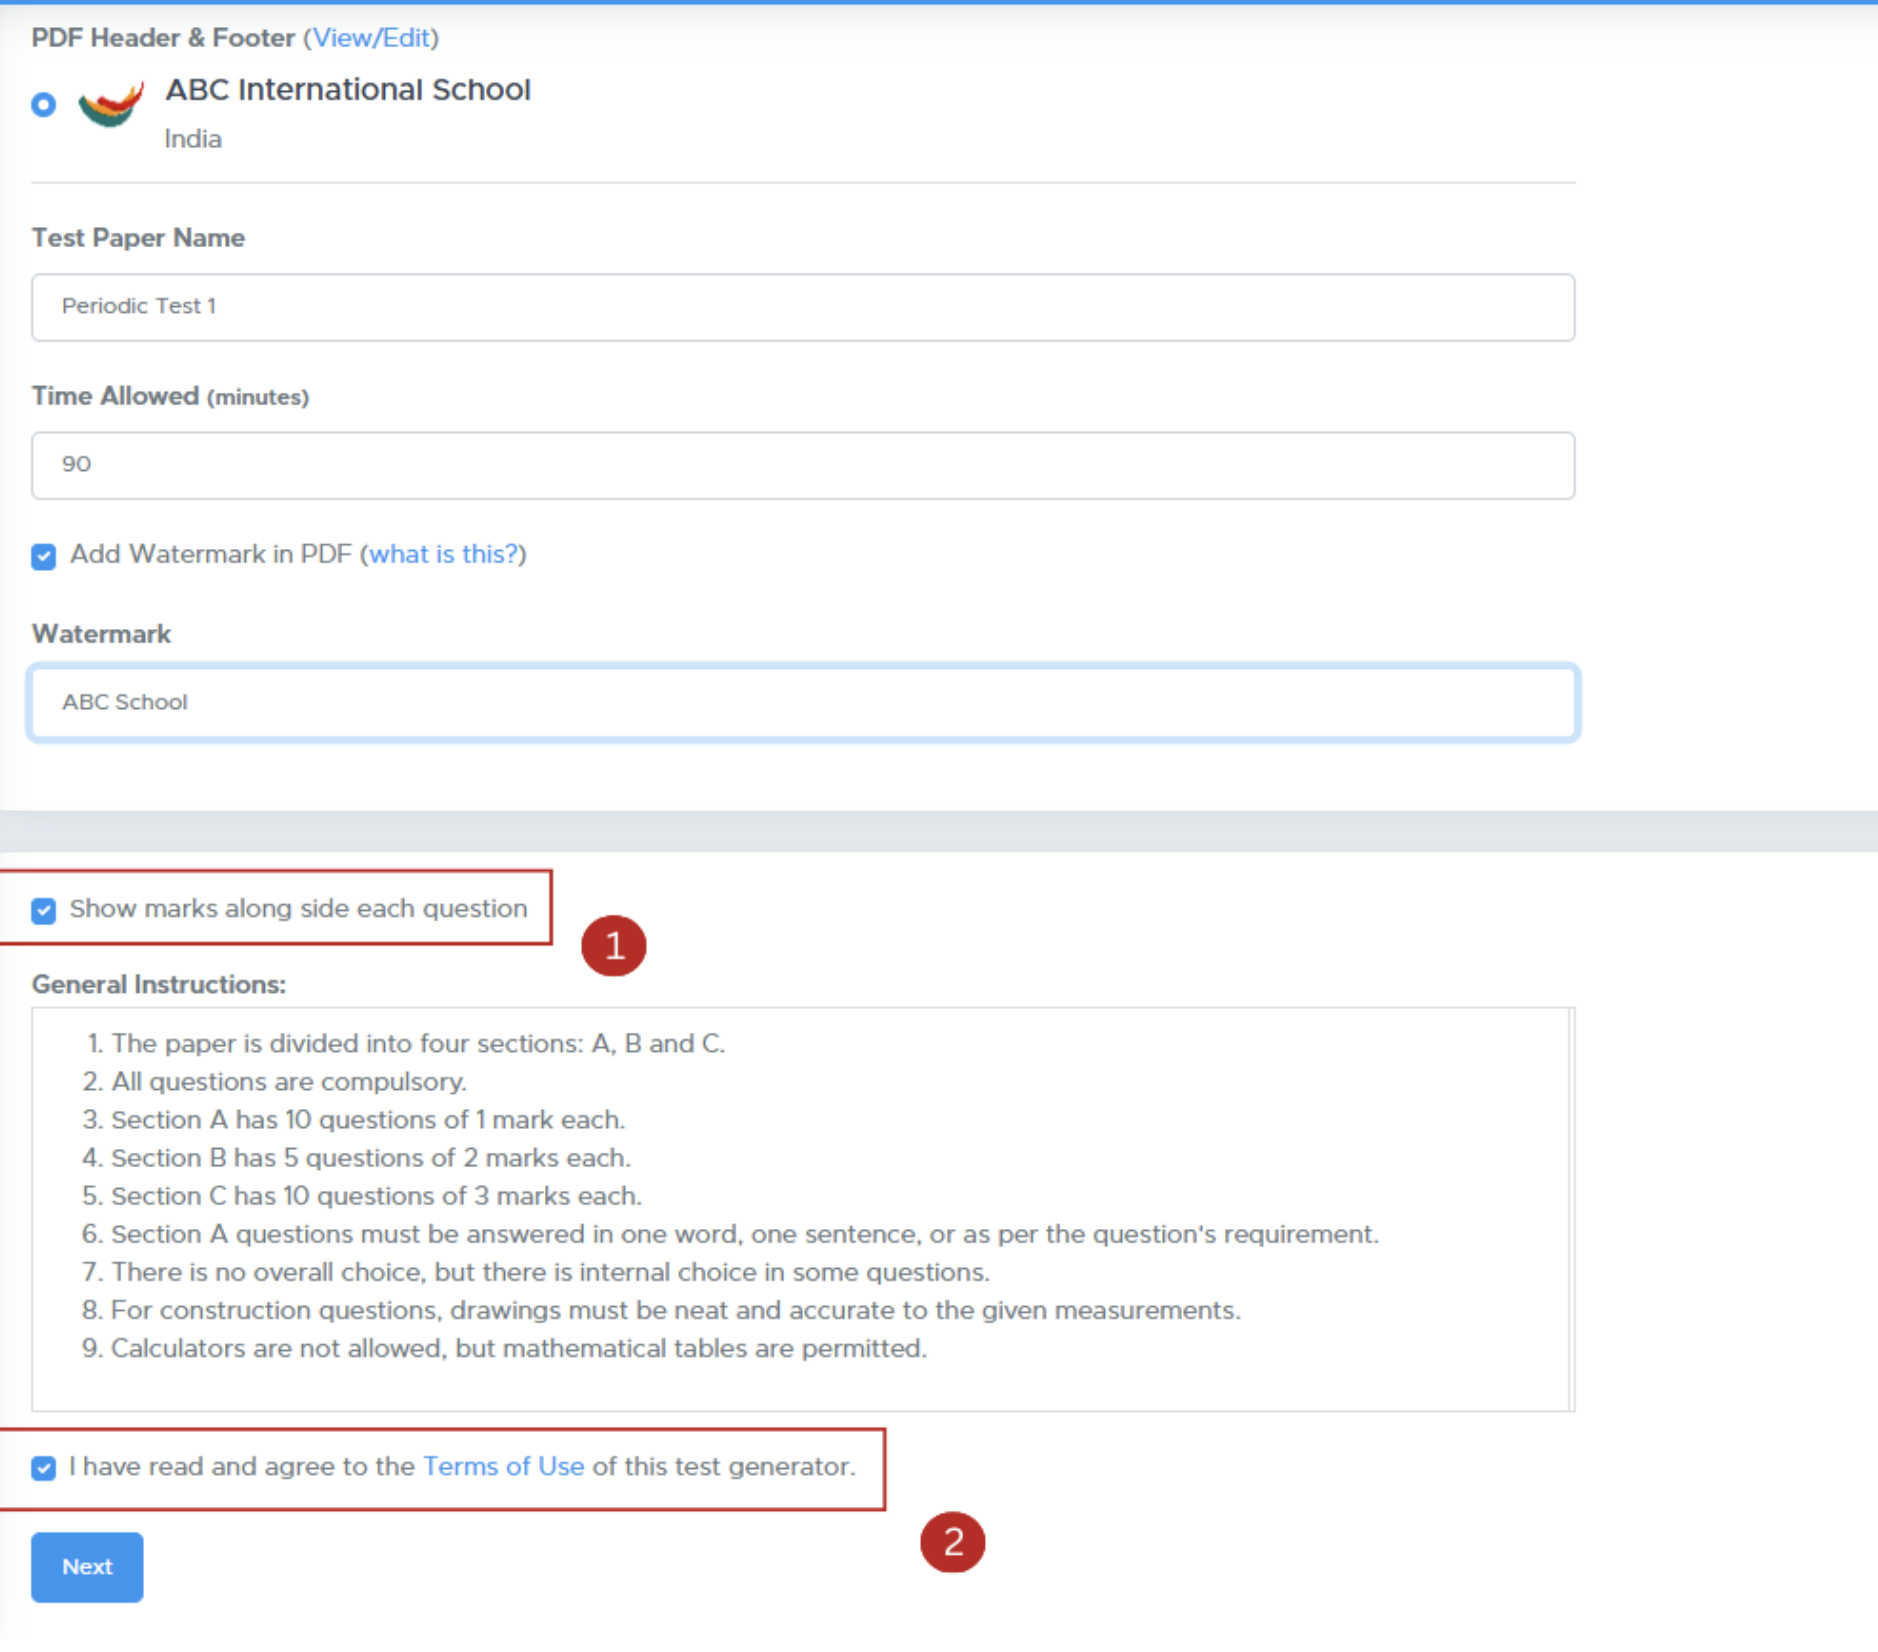
1. **Edit Header and Footer**: Modify your logo and header/footer text.
2. **Test Paper Name**: Enter the name for the test paper.
3. **Time Allowed**: Specify the duration for the test.
4. **Watermark and Marks**: Choose to add a watermark and show marks alongside each question.
5. \*\*Specify additional settings: \*\*Show marks alongside each question.
6. Accept the **Terms of Use** checkbox and proceed by clicking **Next**.
### Step 3: Specify Course and Subject
1. **Module Selection**: Choose from available modules (e.g., CBSE, ICSE, Entrance Exam etc).
2. **Select Course**: Choose the relevant course for the test.
3. **Competitive Exams**: If applicable, select the specific exam type and whether to create a single or multiple-subject paper. To get the PYQ papers of JEE and NEET, you must select the Multiple Subjects option there.
### Step 4: Configure Test Paper Settings
1. **Source Selection**: Choose your question source as All Questions.
2. **Test Paper Type**: Decide the format as Question Paper or Online Test.
3. **Blueprint Mode**: Select blueprint mode as "**Previous Year Paper**".
### Step 5: Customize Paper Details
1. **Edit Header and Footer**: Modify your logo and header/footer text.
2. **Test Paper Name**: Enter the name for the test paper.
3. **Time Allowed**: Specify the duration for the test.
4. **Watermark and Marks**: Choose to add a watermark and show marks alongside each question.
5. \*\*Specify additional settings: \*\*Show marks alongside each question.
6. Accept the **Terms of Use** checkbox and proceed by clicking **Next**.
 ### **Step 6: Final Review and Generation**
Click on **Refresh** to proceed.
1. Use the **Actions** button to replace or reorder questions. If you want to include internal choices within a section, Tick the checkbox labeled **"Add Internal Choice Within Sections"**
2. **Generate Paper**: Click **'Generate Paper'** to finalize your test paper.
### **Step 7: Download Your Test Paper**
1. **Access Your Paper**: After generation, you’ll be directed to the **'My Paper'** page.
2. **Download Format**: Click the **Actions** button to download as .doc (Word) or .pdf.
### **Step 6: Final Review and Generation**
Click on **Refresh** to proceed.
1. Use the **Actions** button to replace or reorder questions. If you want to include internal choices within a section, Tick the checkbox labeled **"Add Internal Choice Within Sections"**
2. **Generate Paper**: Click **'Generate Paper'** to finalize your test paper.
### **Step 7: Download Your Test Paper**
1. **Access Your Paper**: After generation, you’ll be directed to the **'My Paper'** page.
2. **Download Format**: Click the **Actions** button to download as .doc (Word) or .pdf.