Create Batch
To create a batch, go to the My Institute section, click Batches, and then select Add Batch. Schools can create section-wise batches such as VI-A, VI-B, VII-A, VII-B, and so on. Institutes can name batches based on subjects or schedules, for example, Maths Morning Batch or Science Evening Batch.Edit Batch Name
To edit a batch name, click on Manage Batch and scroll down to the Summary section. Then, click the Edit link to update the batch name.Delete Batch
To delete a batch, go to Manage Batch, scroll down to the Summary section, and click the Delete link. Before deleting the batch, ensure that all students have been removed from it.Student Management
In this section, you can add, remove, and assign students to batches. Once students are added to a batch in the Examin8 Test Generator, you can also track their performance and download their report cards.Add Students
There are three ways to add students to the batch.- With Email ID
- With the Invite Link
- With a CVS file (students in Bulk)
- The student will click on the link and register themselves with their mobile number, email ID or Gmail or Facebook ID.
- On successful registration, they will get a message “Approval Pending”.
- Now, you can go to Batch Management and click on the Students button.
- Here, you will find all these pending requests for Approval under the Pending button.
- Just approve the requests to add the students to the batch or reject them to discard. It is done.
| First Name | Last Name | Password | Class | Batch Codes | Institute Id | |
|---|---|---|---|---|---|---|
| AICHENG | GOGOI | 20207001@sibgovthsmp.org | 20207001 | 7 | R4JG8N | Leave Blank |
Remove Student
To remove a student, go to Batch Management and click the Student button. Select the student and then click Remove. Once a student is removed from a batch, they will no longer be able to log in to that batch. However, you can add the student again at any time in the future.Disable Student
If you do not want to remove a student permanently but only wish to temporarily restrict access to content or online tests, you can disable the student by clicking the Disable button on the same page. In this case, the student will still be able to log in to the batch, but the buttons for online tests and content access will remain inactive until the access is enabled again.Edit Student Name
If you have added students using a custom email domain and this feature is enabled in your Test Generator account, you can also edit the student’s name. To do this, go to Batch Management, click Students, and then select the Edit Name button below the student’s name to make the changes.Reset Student Password
On the same screen under Batch Management > Students, you will find an option on the middle right to reset a student’s password. Please note that the Reset Password option is available only if you are using a custom email domain and have requested us to enable this feature for your account. For example, this applies when students are added using a dummy email domain such as studentname@yourinstitute.com.Change Batch
If a batch has already been assigned to a student and you need to change it for any reason, go to Batch Management and click the Change Batch button next to the student’s name. You can also assign the same student to multiple batches if required.Assign Batch
If you have conducted online tests using direct links and some students joined your institute without being enrolled in a batch, you can find them under the Student tab in the My Institute section. On the Test Generator home page, scroll down to the My Institute block and click Students. On this page, click the Batch Not Assigned button to view the list of such students. Simply select a student and click the Assign Batch button to enroll them into a batch.Performance Analysis
When you go to Batch Management and click the Students icon, you will see two buttons below each student’s name: Performance and Report Card. The same analysis can also be accessed from the Overall Performance section in Batch Management.
Report Card
The report card is the test-wise performance of the student. It shows the score of the student in individual tests attempted by the student.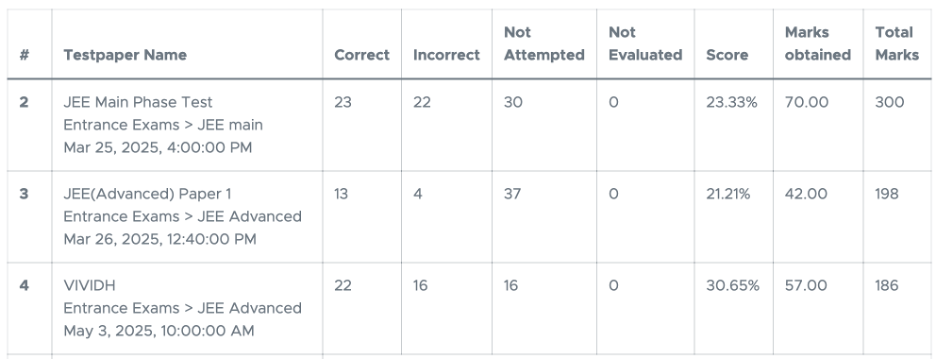
Performance
Here, Performance refers to the student’s topic-wise analysis. It is crucial to understand which topics a student is performing well in and which ones need improvement. This analysis provides deep insights into the student’s overall topic-level performance, based on all the tests attempted by him or her.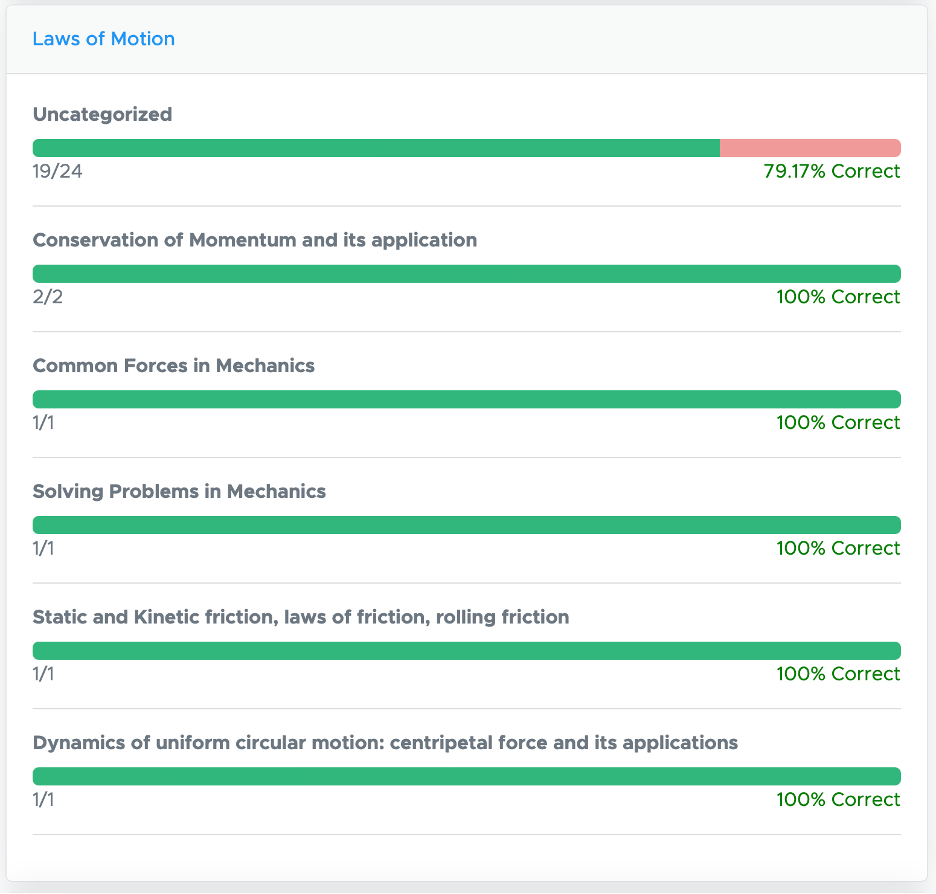
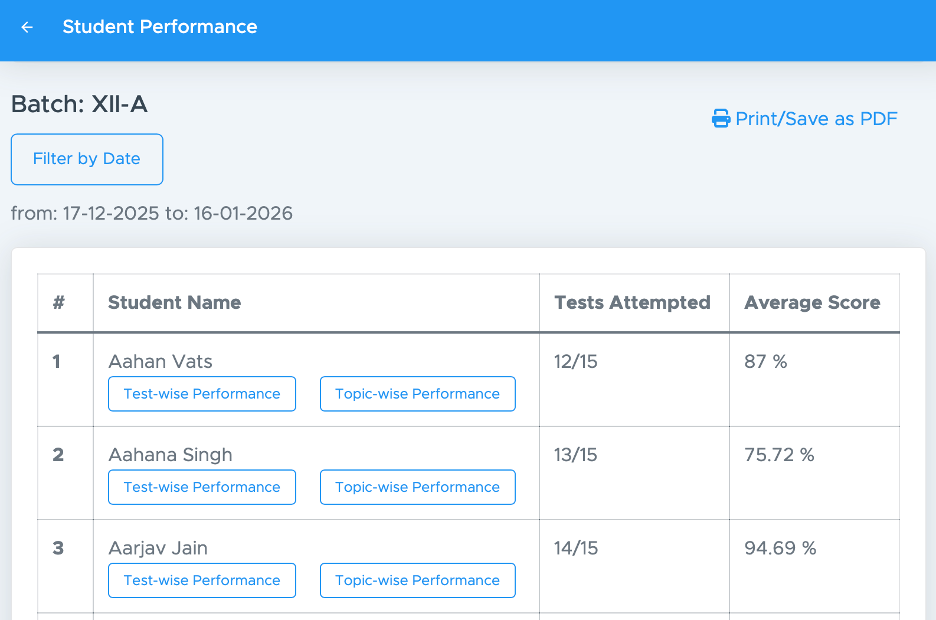
Overall Performance
Consolidating both the Report Card (Test-wise Analysis) and the Performance (Topic-wise Analysis), we have an overall performance analysis inside Batch Management.