Who should use it?
Here are some use cases where the “I will add Questions” blueprint mode best fits.- Examin8 doesn’t have a question bank
- Examin8 has very few questions
- You want to create a custom test with your own questions
- You have already uploaded questions to the Examin8 question bank and are willing to use those questions only.
How is it Different?
In “I will add Questions” mode, we provide you with the interface only. Here, you will create your own blueprint and add questions to it. In other cases, we have ready-made blueprints and a question bank.How to Create Papers in “I Will Add Questions” Mode?
Here are the steps to follow while creating a question paper in this mode:Demo Video:
I will add mode: https://youtu.be/bdQ6FLZhLRI?si=P9ipbpp9QDht2mKXStep 1: Create a New Paper
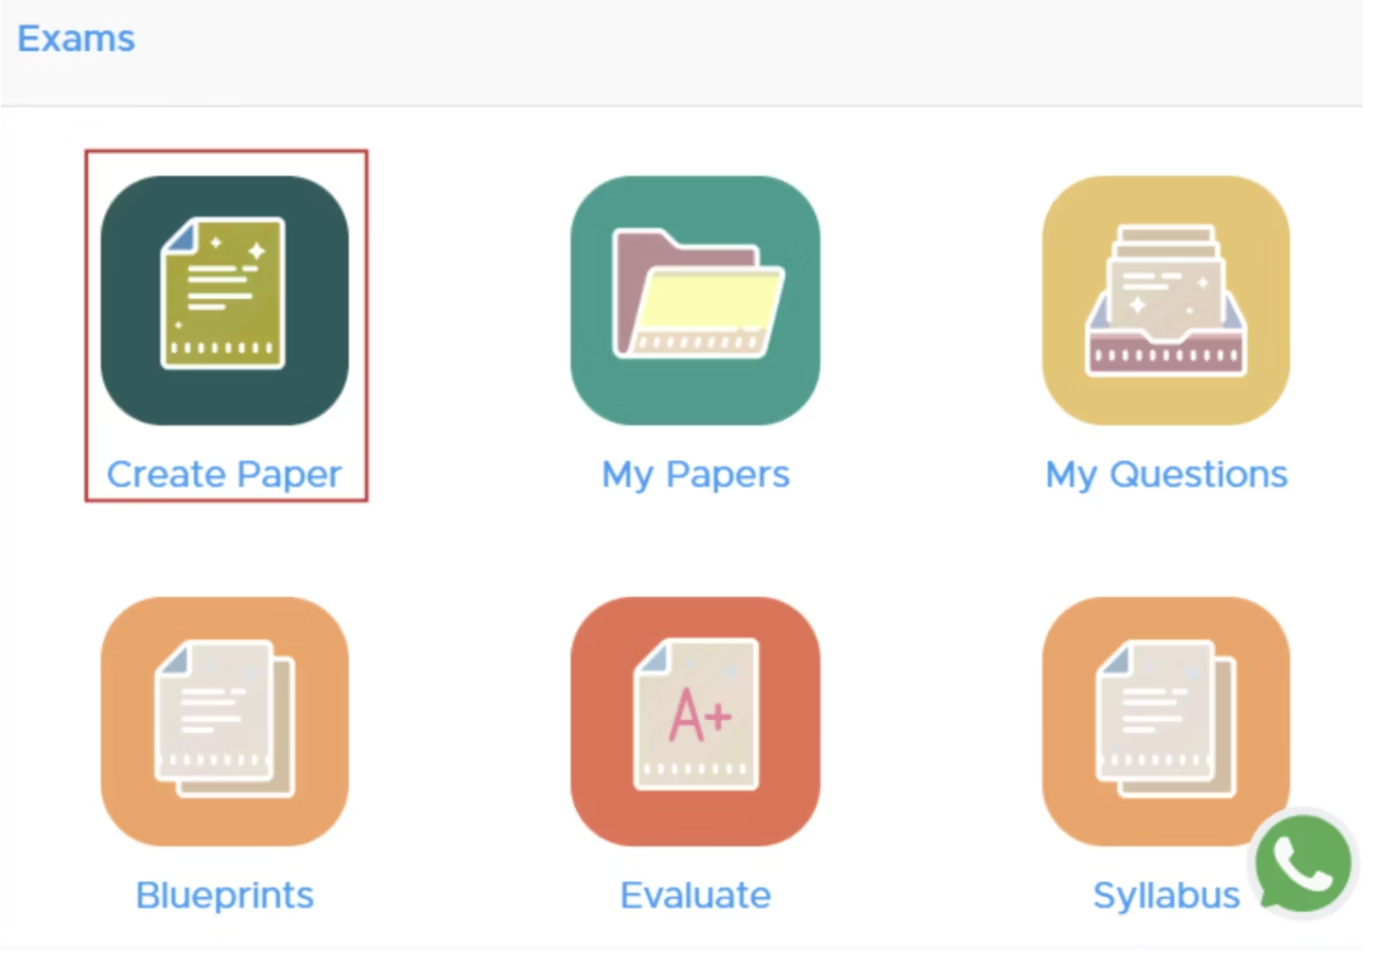
- Navigate to Exams: Go to the “Exams” section.
-
Select ‘Create Paper’: Click on the ‘Create Paper’ button. New users must add the institute details there to proceed.
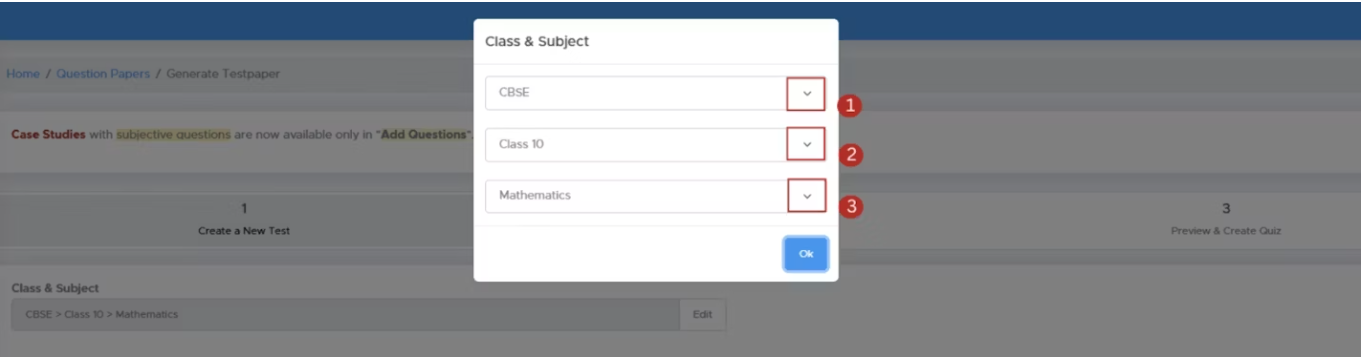
Step 2: Select Class and Subject
Choose Class and Subject: Click on the**“Select”**button to pick the class and subject for your test paper.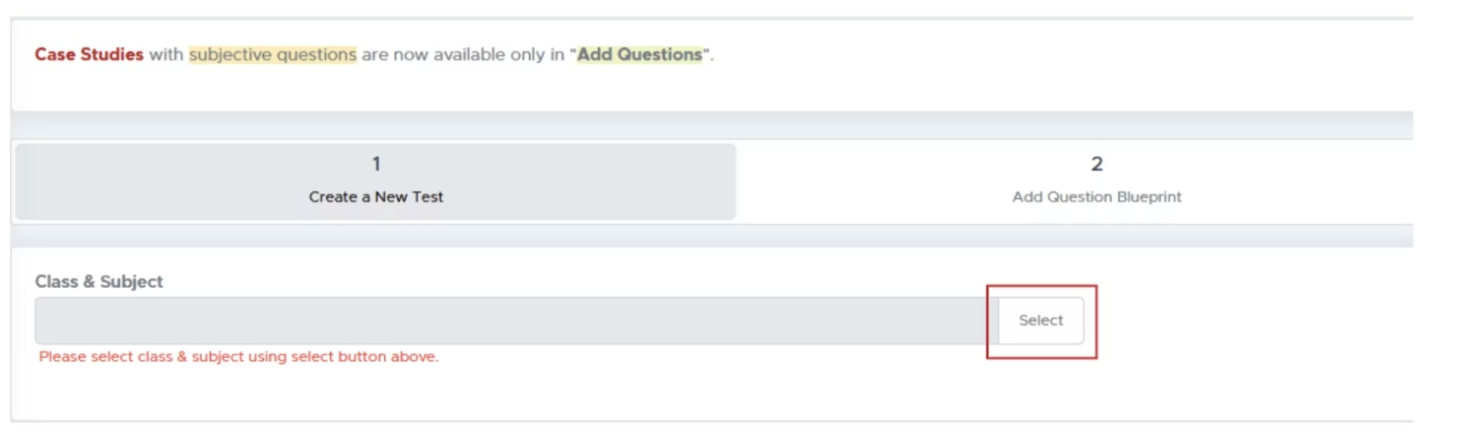
Step 3: Specify Course and Subject
- Module Selection: Choose from available modules (e.g., CBSE, ICSE).
- Select Course: Choose the relevant course for the test.
- Competitive Exams: If applicable, select the specific exam type and whether to create a single or multiple-subject paper.
Step 4: Configure Test Paper Settings
- Source Selection: Choose your question source as All Questions (only for premium users). If you are not getting this option, you need to Buy Subscription to access this feature.
- Test Paper Type: Decide the format (Question Paper, Worksheet, etc.).
- Blueprint Mode: Here, you must select I will add Questions Mode
Step 5: Customize Paper Details
- Select Header and Footer: You can select the PDF header that you have already added there. You can also modify your logo and header/footer text by clicking the edit header link.
- Test Paper Name: Enter a name for your question paper, such as “Half Yearly Exam,” “Periodic Test - 1,” or “Annual Examination.”
- Time Allowed: Edit the duration for the question paper if required.
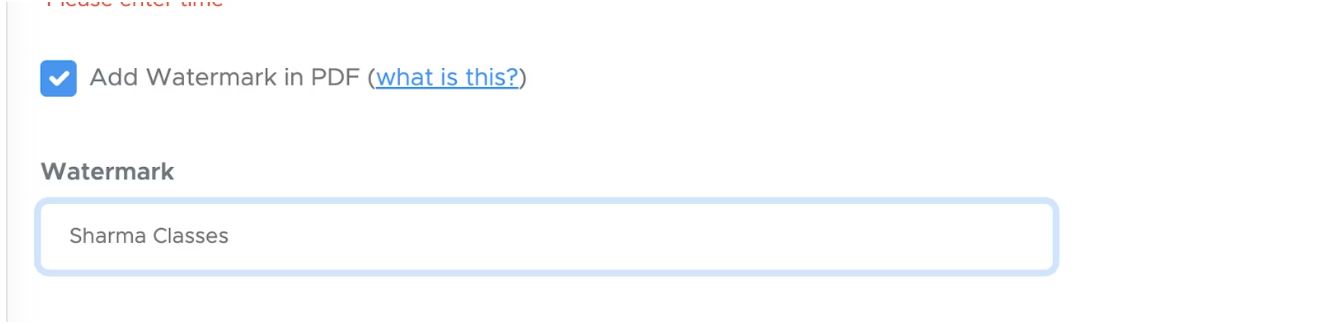
- Add Watermark (optional): If you would like to add a diagonal text watermark to your PDF files, choose to add a watermark. Generally, schools don’t add a watermark to papers.
- Show Marks: If you don’t want marks to appear next to each question, uncheck the box. Otherwise, keep it checked.
- General Instructions: Some default instructions are provided in Dynamic Mode. You can edit or delete them as needed.
- Accept the Terms of Use checkbox and proceed by clicking Next.
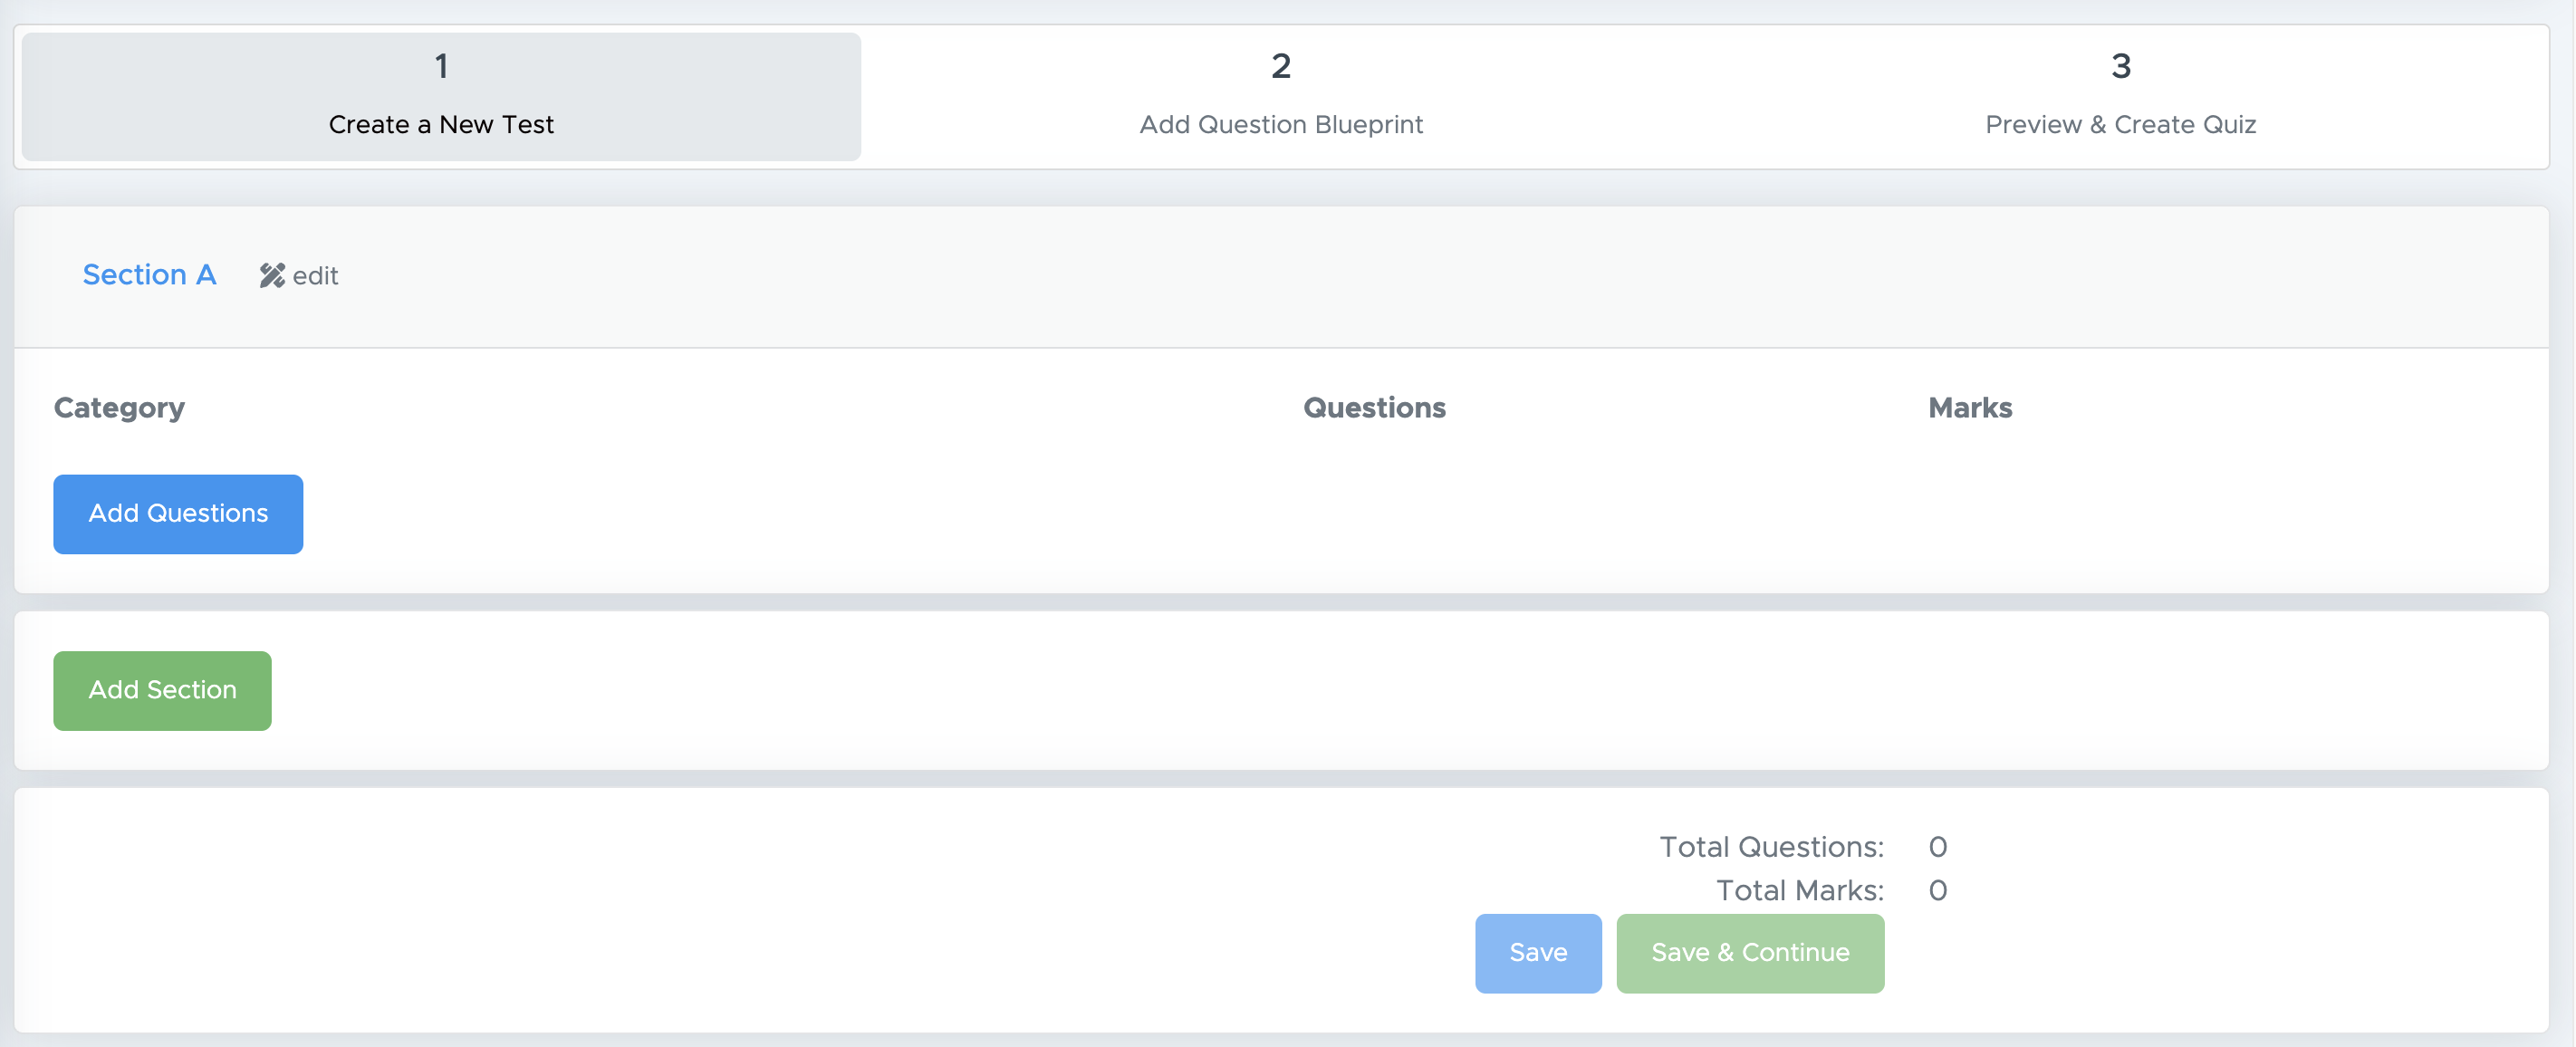
Step 6: (A) Add questions (from uploaded questions)
-
Here, you can edit the section name (if required) by clicking on the edit icon placed beside the section name.
-
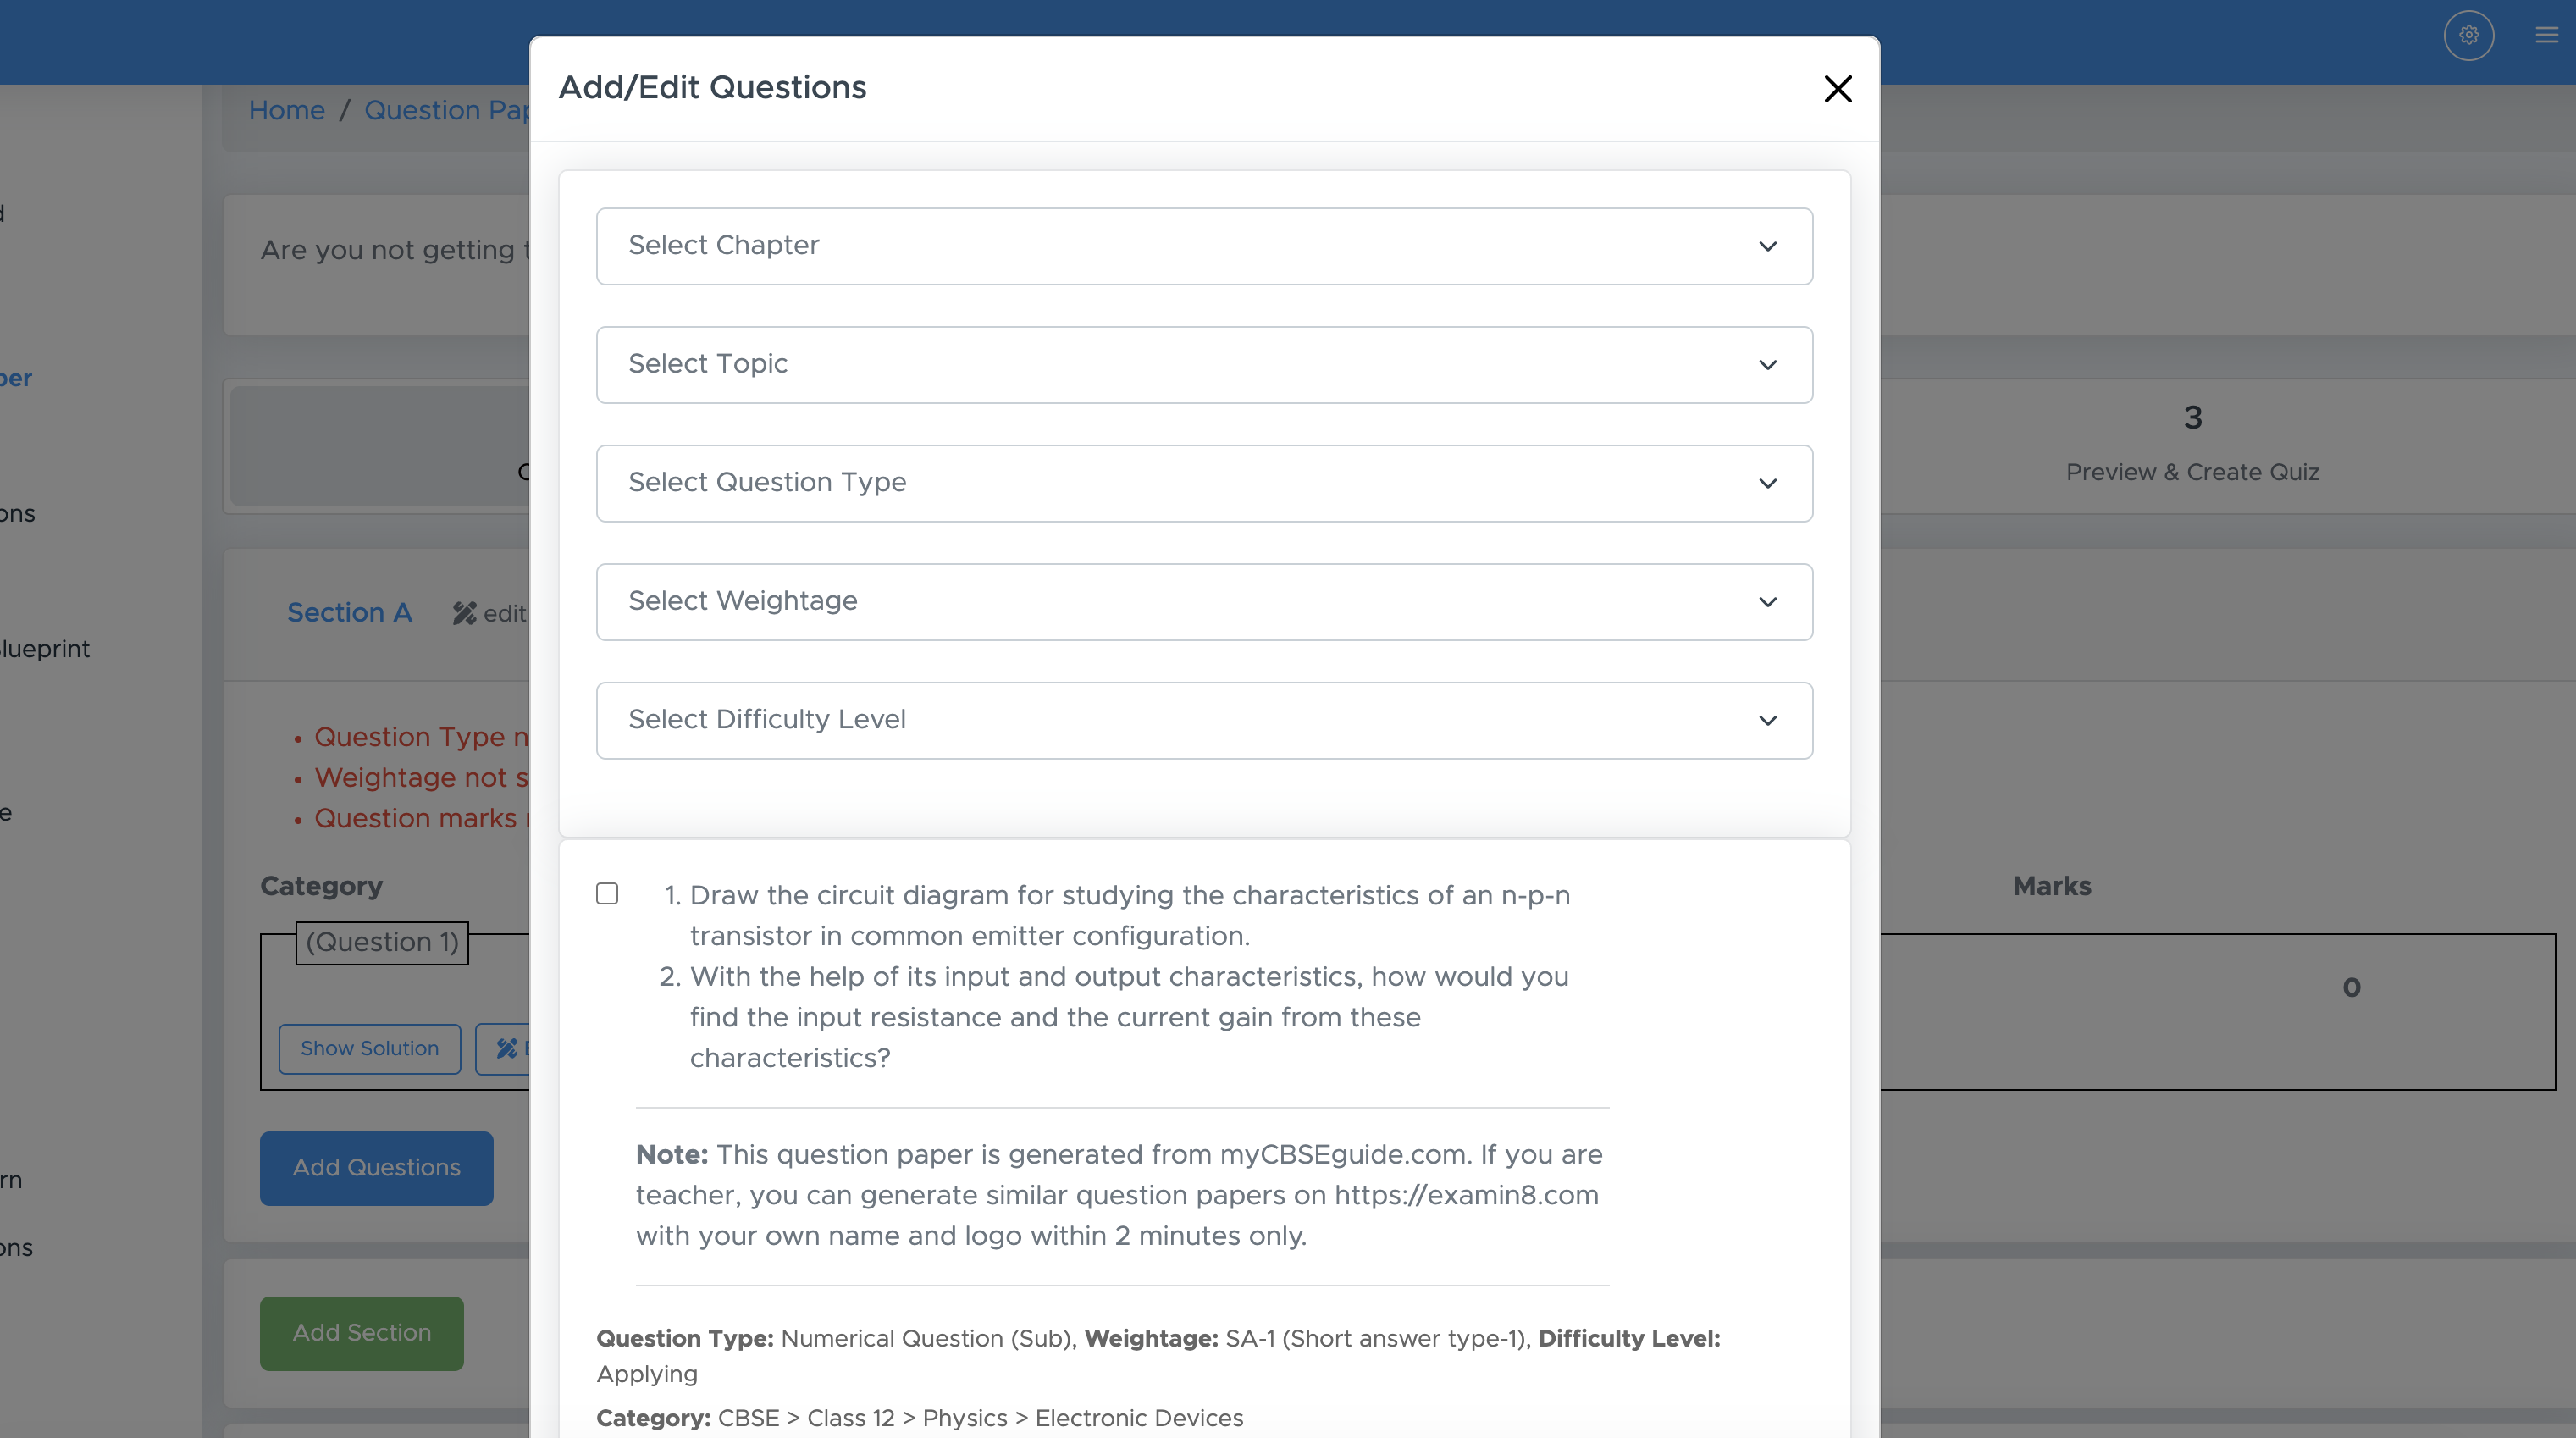
After that, click “Add Questions” to start adding questions. You will get a pop-up as below:
-
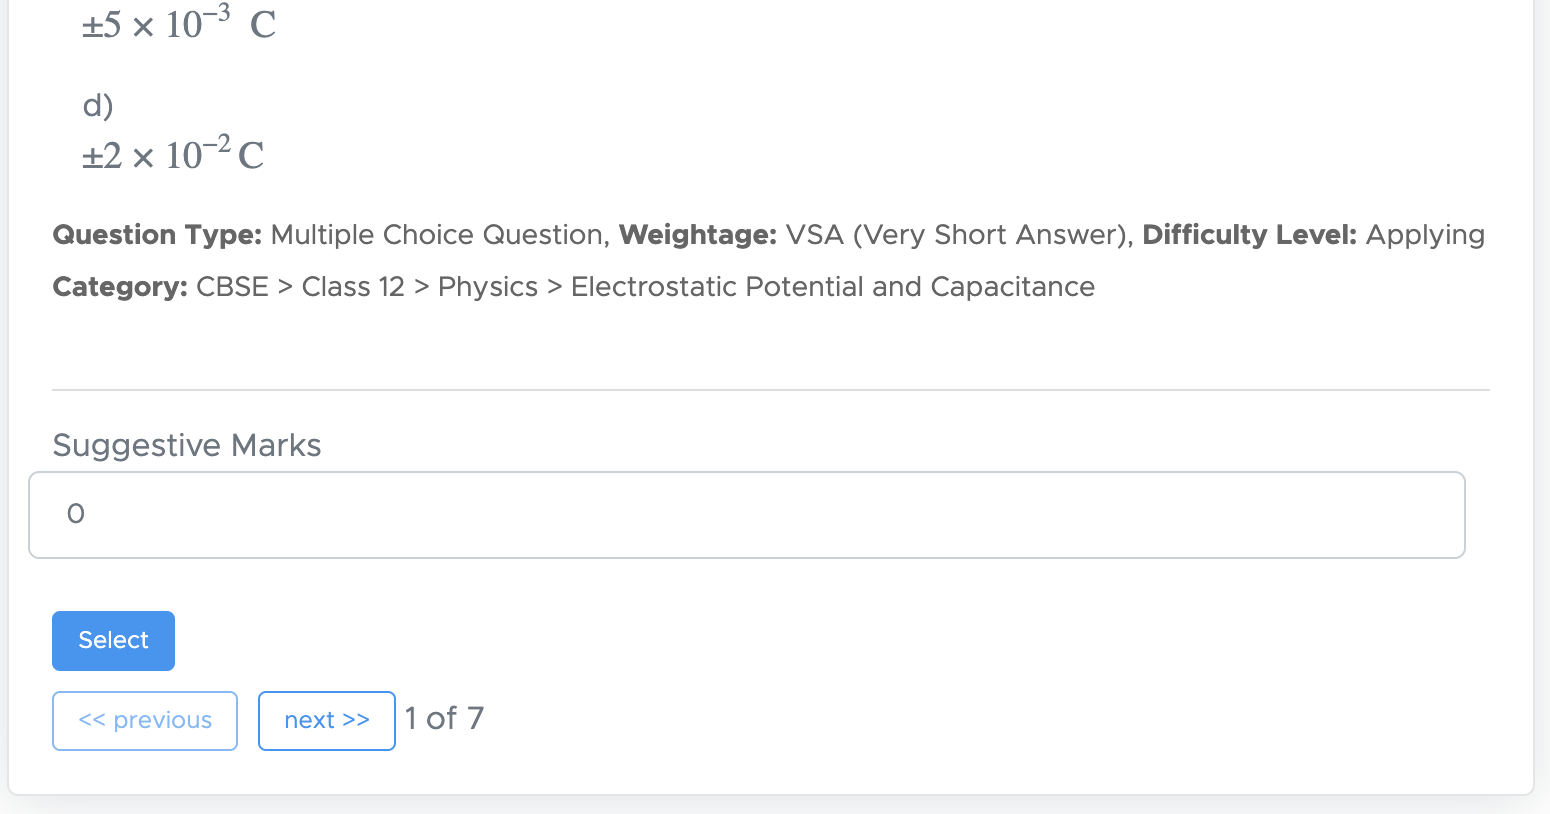
If you’ve already uploaded questions in My Questions, you’ll see them listed just below the filters. Simply tick the checkboxes next to the questions you want, enter the Suggested Marks, and then click the Select button at the bottom.
- If you want to select questions from multiple pages at once, tick the checkboxes on the first page, then move to the next pages and continue ticking the desired ones. Once you’ve selected all the questions you need, click the Select button to add them all together in one go.
-
Now, if you want to take questions from a particular chapter or topic, you can use the filters provided there.

- Here, if you want questions from the entire chapter, just select the chapter name and click “Show My Questions”. There is no need to select all the dropdowns.
- However, there are other filters like topic, question type, weightage and difficulty level to further filter out the questions uploaded by you, but it’s purely optional.
Step 6: (B) Upload question (copy-paste or type new question)
- Click on the **Add Question **button
-
Choose all dropdowns one by one where you want to upload new questions, then click Add New Question button.
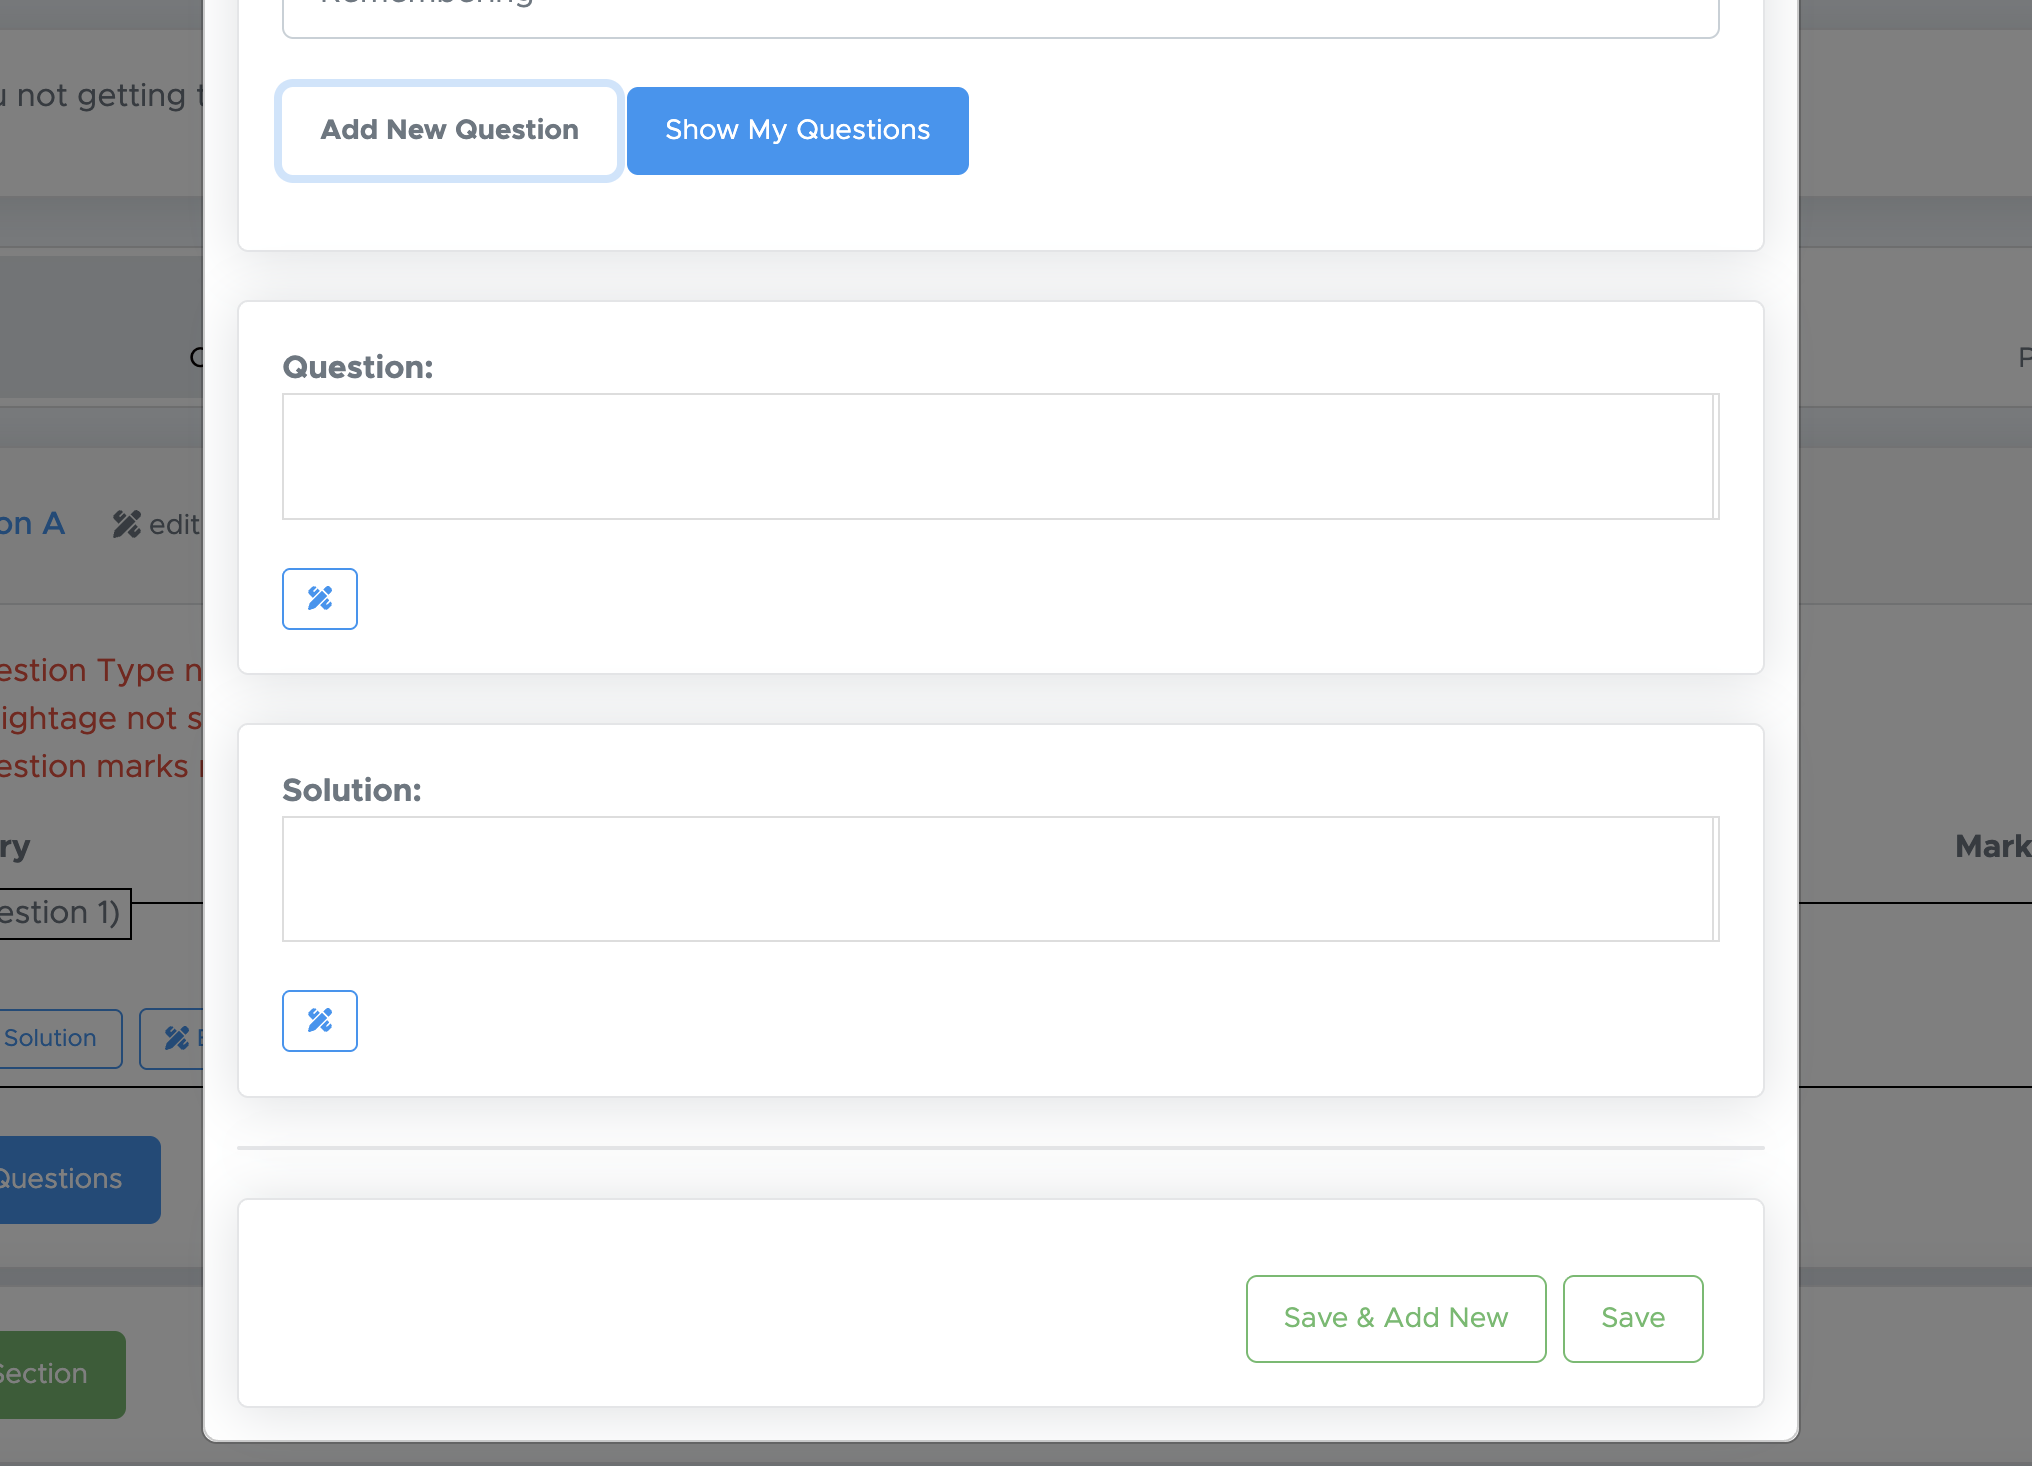
- Here, the fields available will depend on the type of question you choose. For instance, if you select a subjective-type question, you’ll see two fields: Question and Solution.For an objective-type question, you’ll have fields for the Question, four answer options, and an Explanation.
-
Just enter your question here. You will get a toolbar to enter images, tables, math equations etc. You can also set suggestive marks per question here.
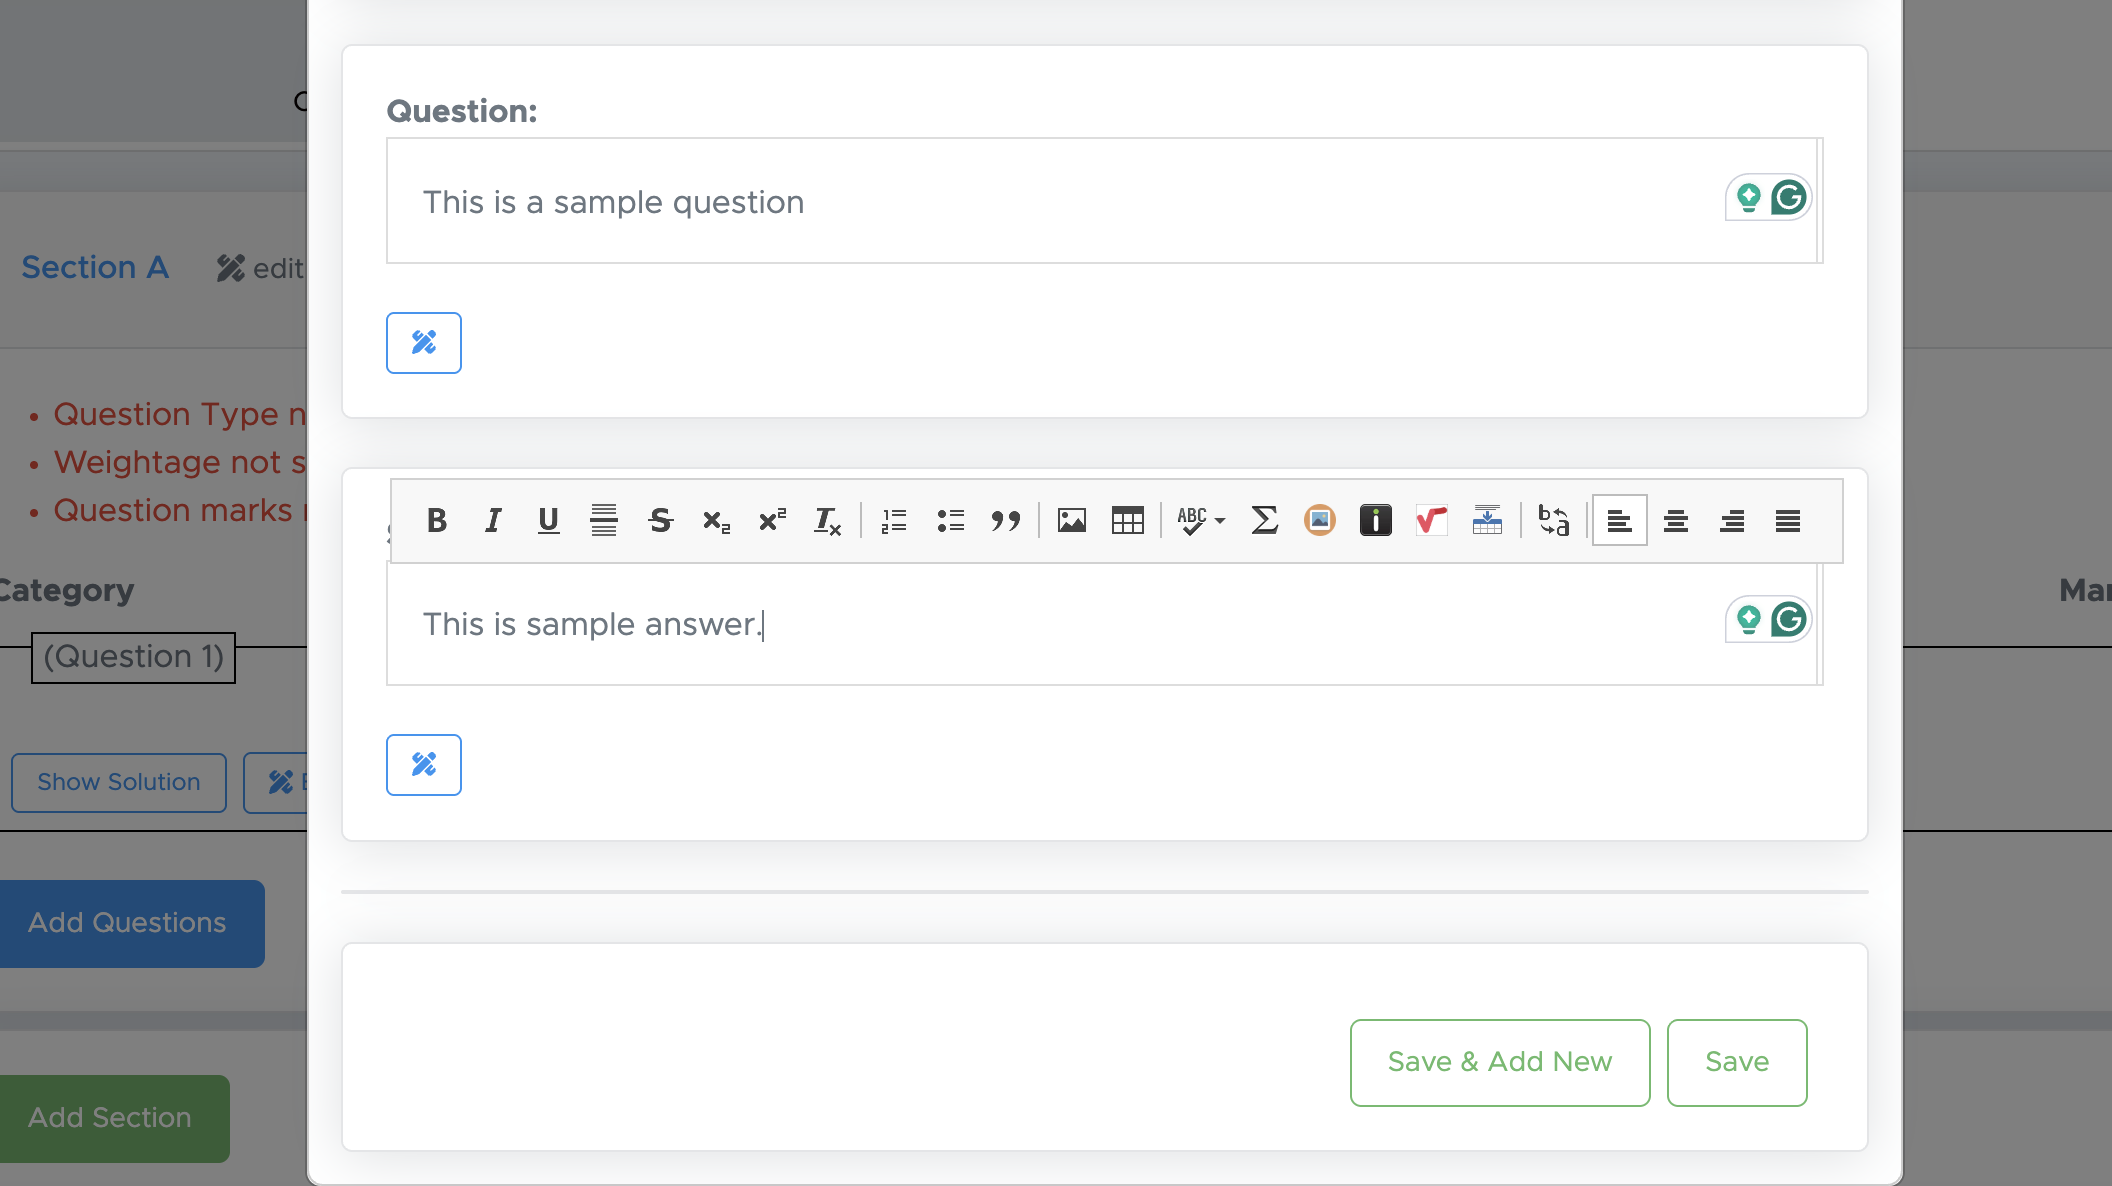
- Then, click the Save and Add New button. All fields above will remain the same, and you will need to add just the question and the answer there. If you are done with it, click the Save button and proceed to the next step.
Difference between Save and Save & Continue buttons
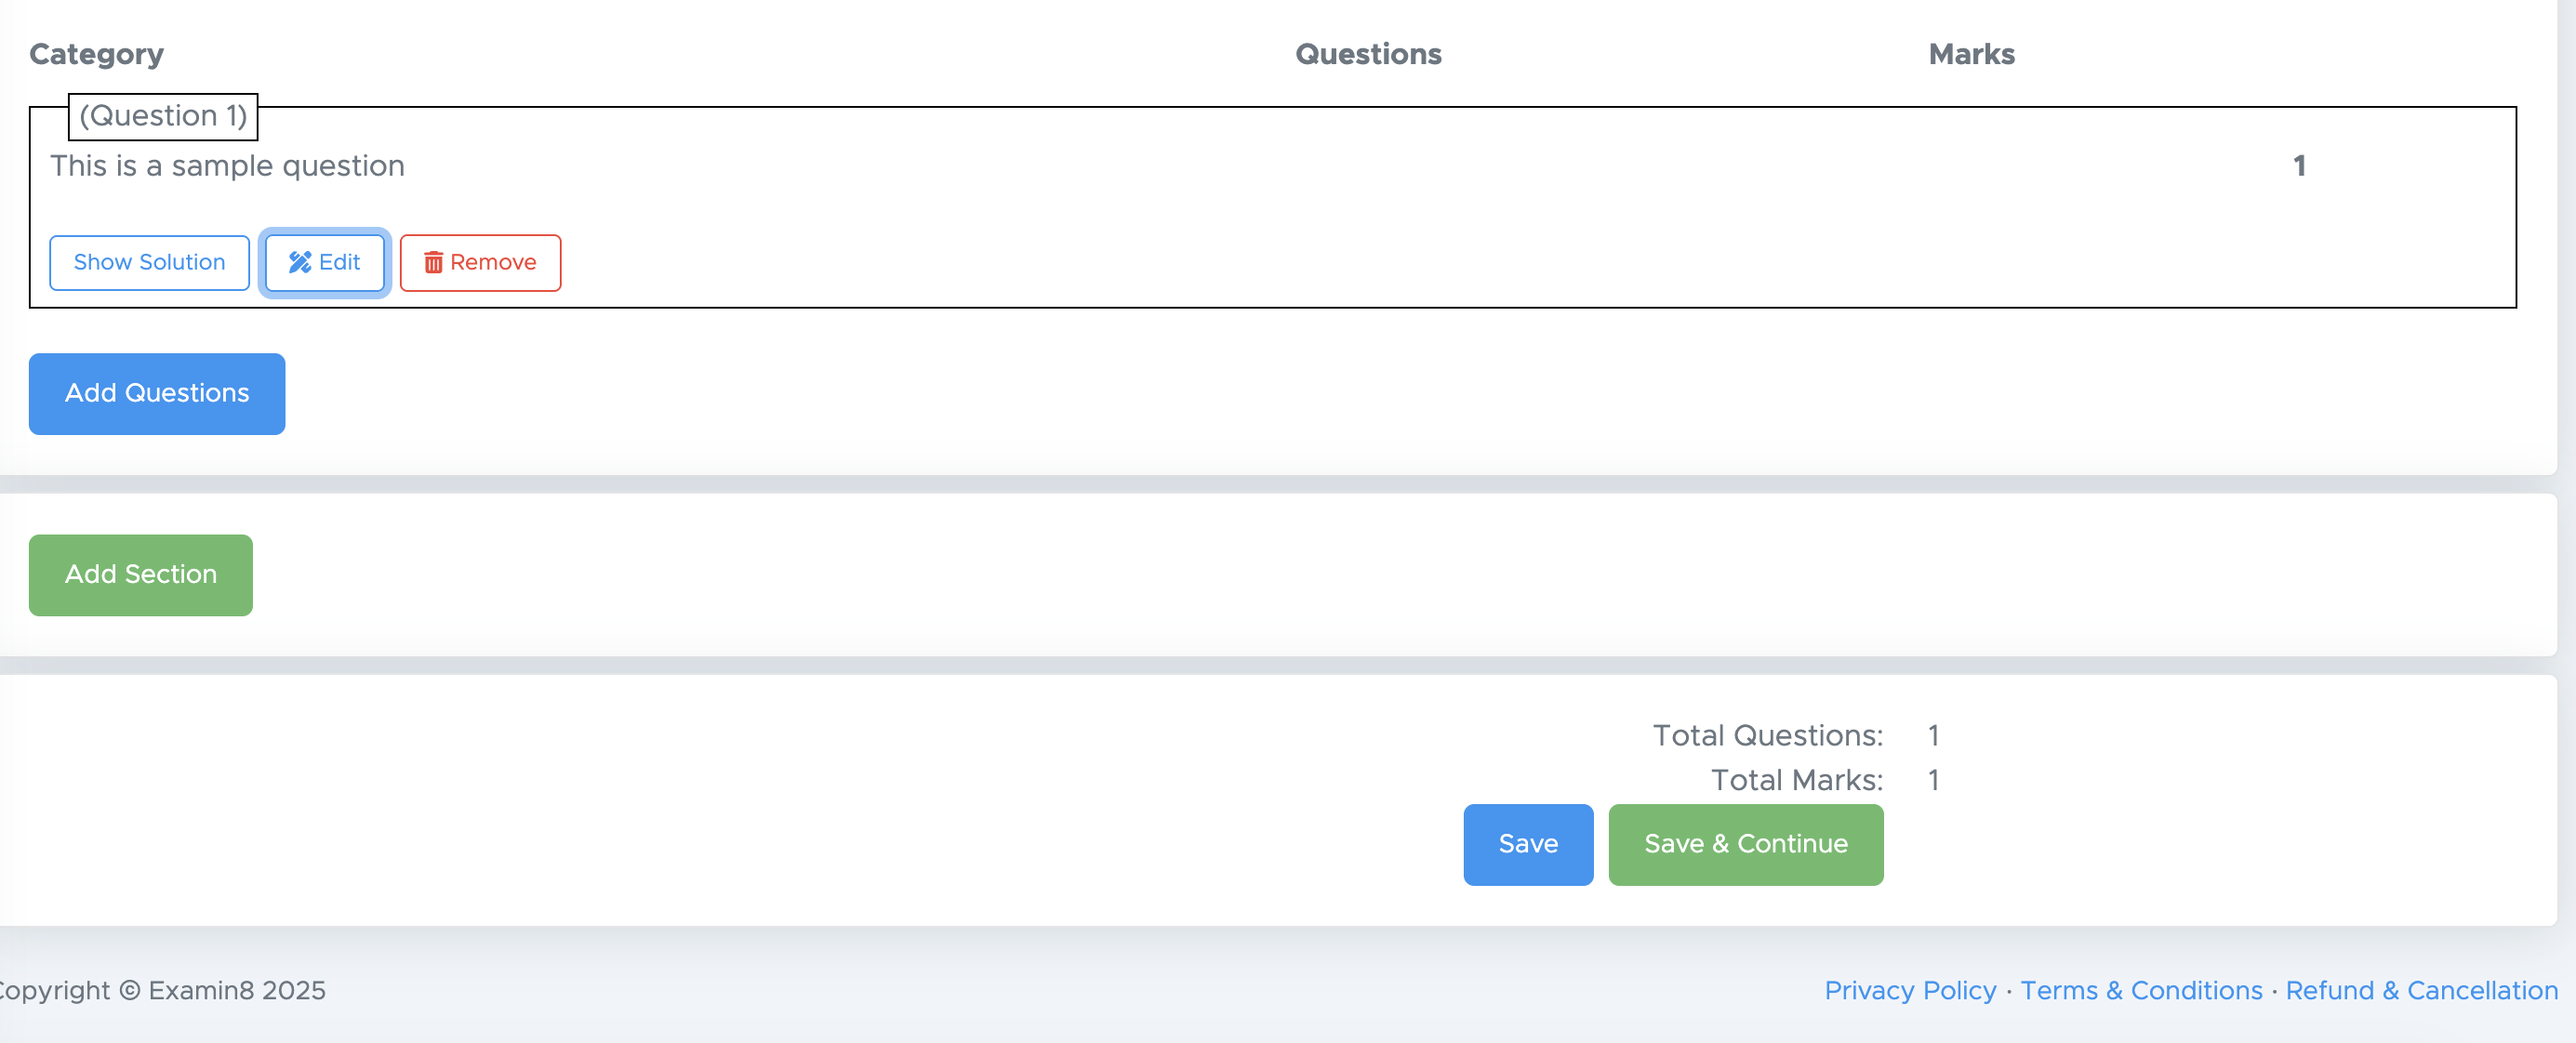
- Save button: If your question paper is still incomplete and you want to save the changes to add more questions in future. You should use the SAVE button. So, using save button you can save your changes and come back to resume your paper from that point.
- Save & Continue: Clicking this button takes you to the next step, and you won’t be able to return to the previous one to add or delete questions. By using Save & Continue, you confirm that this step is complete and you’re ready to proceed to the next stage.
Step 7: Final Review and Generation
Click on **Refresh **to proceed. You will get a question paper with questions added there. You can review them and then proceed to generate the paper. All the changes made in **Step 3 **are saved automatically. If you leave the paper at this step and later return by clicking **RESUME **under MY PAPERS, all your previous changes will be restored automatically.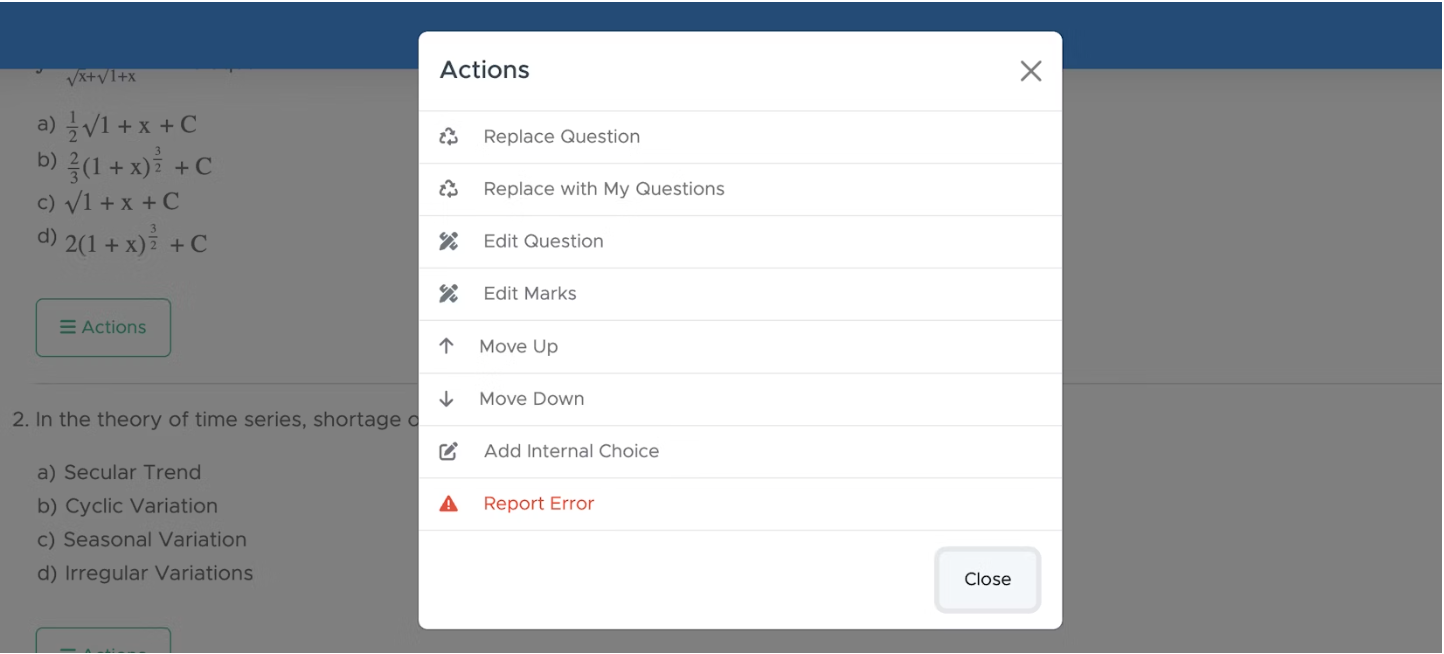
- Edit Section Name: If needed, click the edit icon next to the section name to change or update the section title.
- Move Whole Section Up or Down: Although it is rarely required in Dynamic mode yet you can use this option by clicking the down or up arrow placed beside the section name.
- Replace Question: If you find a question that isn’t relevant, click the Action button below it and select Replace Question. You’ll see up to 30 alternative questions across 3 pages. Choose the one you prefer to replace the current question.
- Replace with My Question: If you’ve already added your own questions in the test generator, click Replace with My Questions to choose a question from your personal list for replacement.
- Move Question Up or Down: If you would like to move a question up or down, click or ACTIONS, then click move up or move down to change the placement of the question.
- Edit Question: If you want to add your own question instead of the one provided, click ACTIONS and then select Edit Question. You can delete the existing question text and enter your own, or simply modify it as needed. You can also edit the options and solution from the same window.
- Edit Marks: If required, you can click on ACTIONS, then click Edit Marks to change the marks.
- Add Internal Choice within Questions: It is an OR between two questions. If you want to provide an internal choice between two questions, click on ACTIONS, then click “Add Internal Choice”.
- Add Internal Choice within Sections: This option works like the instruction “Attempt any 5 questions from this section” shown below a section title. To include such internal choices, check the box labelled Add Internal Choice Within Sections and specify how many questions students should attempt from that section. If all questions need to be attempted, simply leave the section field blank.
- Edit Testpaper Details: On this screen, you can also change the question paper name, time allowed and general instructions.
-
Print Preview: Once the paper is generated, you won’t be able to edit any questions in the PDF file. That’s why Step 3 includes a very useful feature — Print Preview.
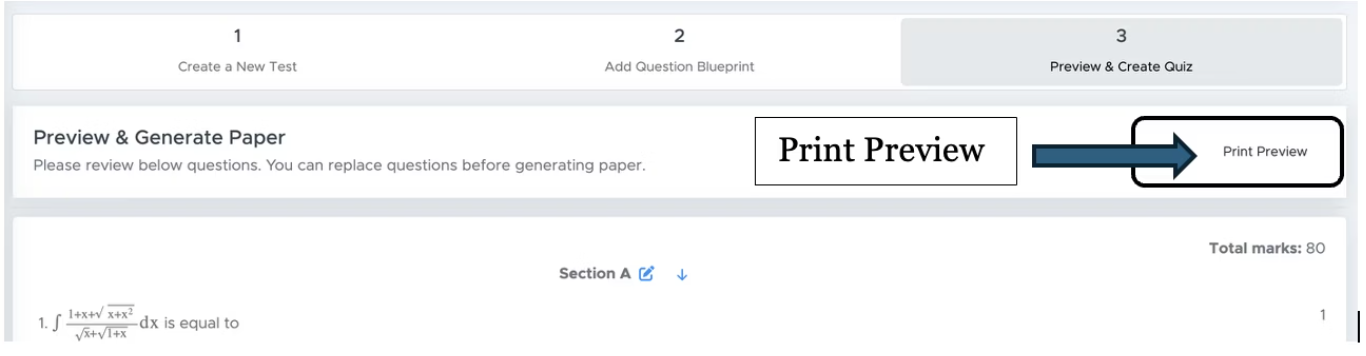
- Click the Print Preview button at the top right, then select PRINT, and save the file as a PDF. You can share this draft with your school examination in-charge or the concerned person for review. After receiving their feedback, return to this page, make the suggested changes, and finally click Generate Paper to create the final PDF or Word file.
- Generate Paper: Click ‘Generate Paper’ to finalise your test paper.
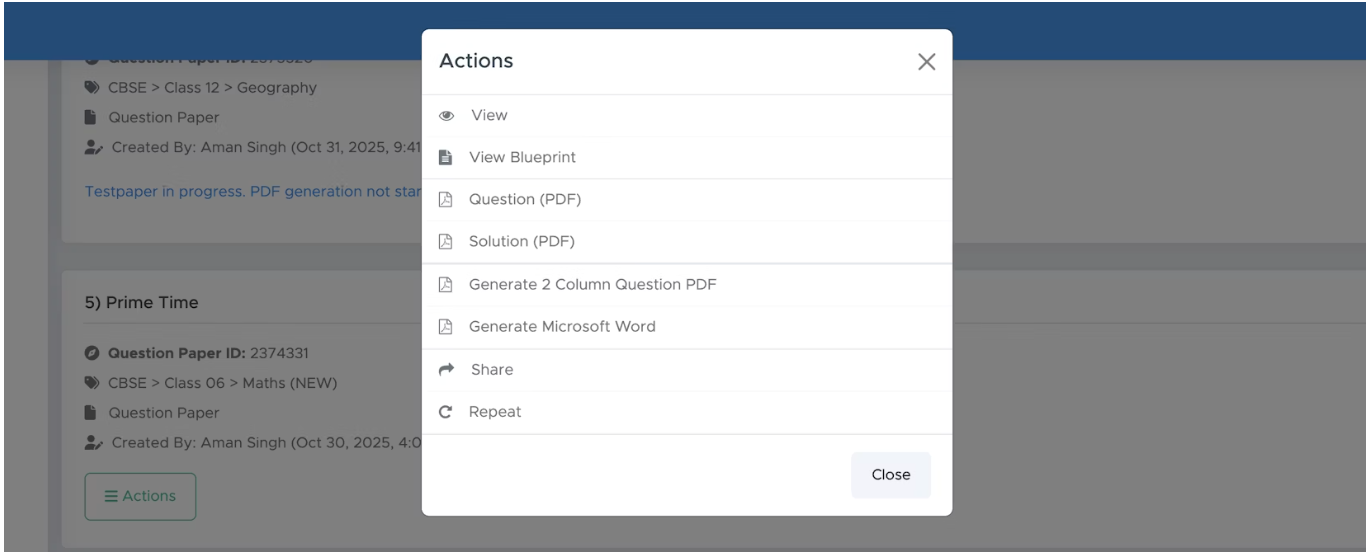
Step 8: Download Your Test Paper
- Access Your Paper: After generation, you’ll be directed to the ‘My Paper’ page.
-
Download Format: Click the Actions button to download as .doc (Word) or .pdf.
FAQs
1. What formats are supported for the logo? Supported formats include .jpg and .png. 2. Can I edit the test paper after generating it? No, you can’t edit a paper once it’s generated. However, you can create a copy of it by clicking **ACTIONS **and then REPEAT. This will let you make the desired changes in Step 3. 3. Is there a limit to the number of questions I can add? Yes, you can add up to **75 questions **(including optional ones) for school subjects. For entranceand competitive exams, the limit is **200 questions **per paper. 4. Can I create papers for competitive exams? Yes, Examin8 supports papers for various competitive exams. Contact Support For assistance, please reach out to our support team:- Email: contact@examin8.com
- Phone: +91-9213522769, +91-8448425258