Step 1: Create a New Paper
-
Navigate to Exams: Go to the “Exams” section.
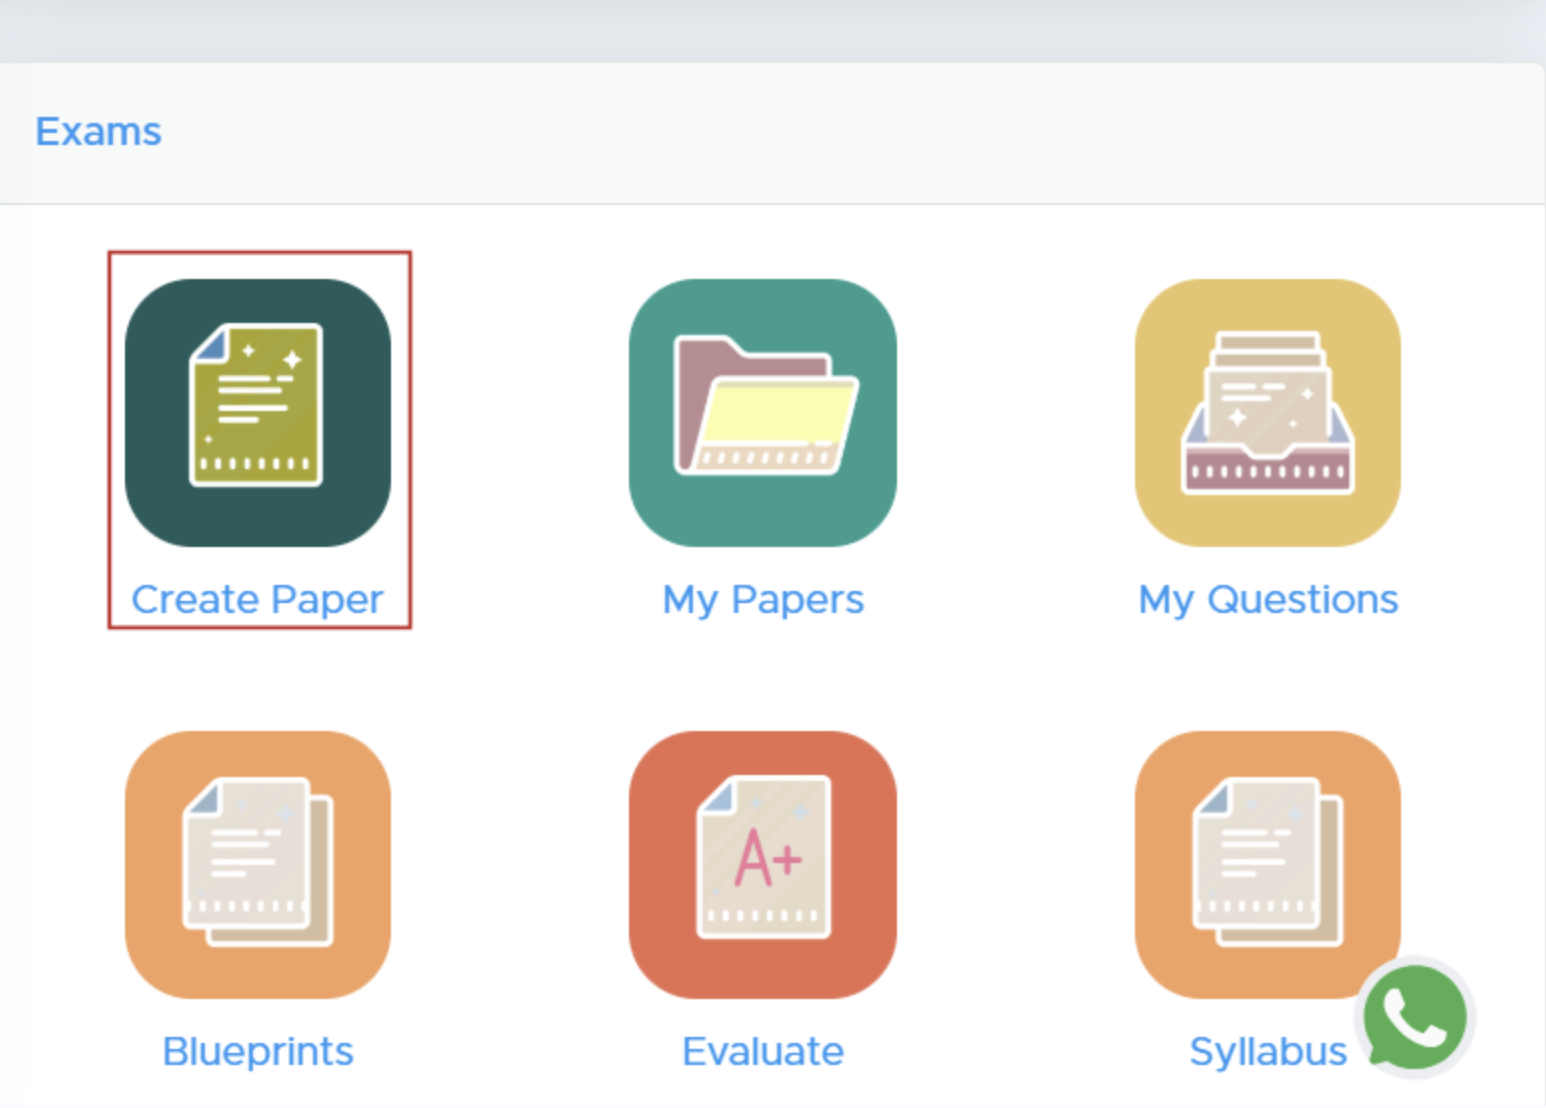
- Select ‘Create Paper’: Click on the ‘Create Paper’ button. New users must add institute details there to proceed.
Step 2: Select Class and Subject
-
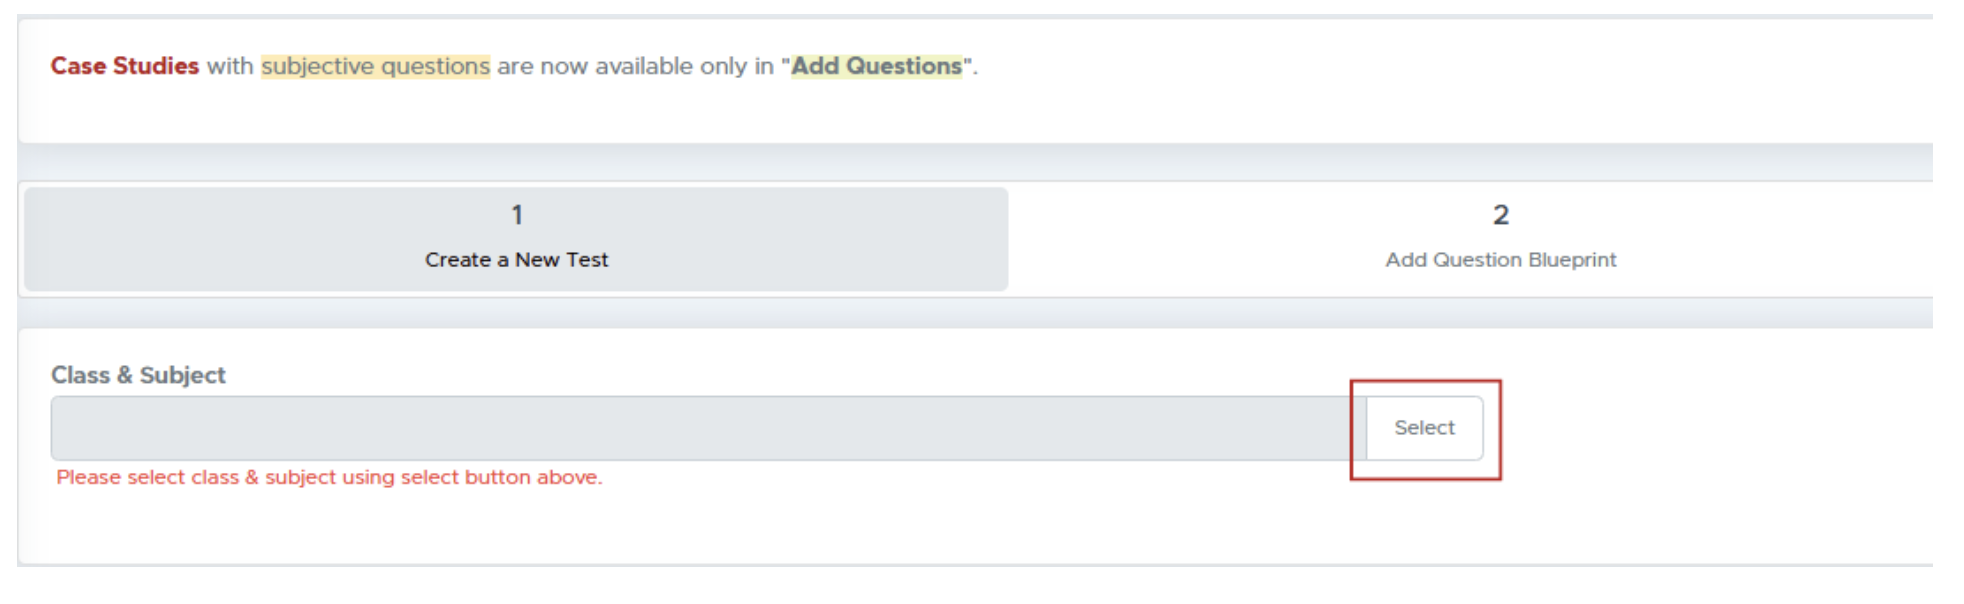
Choose Class and Subject: Click on the “Select” button to pick the class and subject for your test paper.
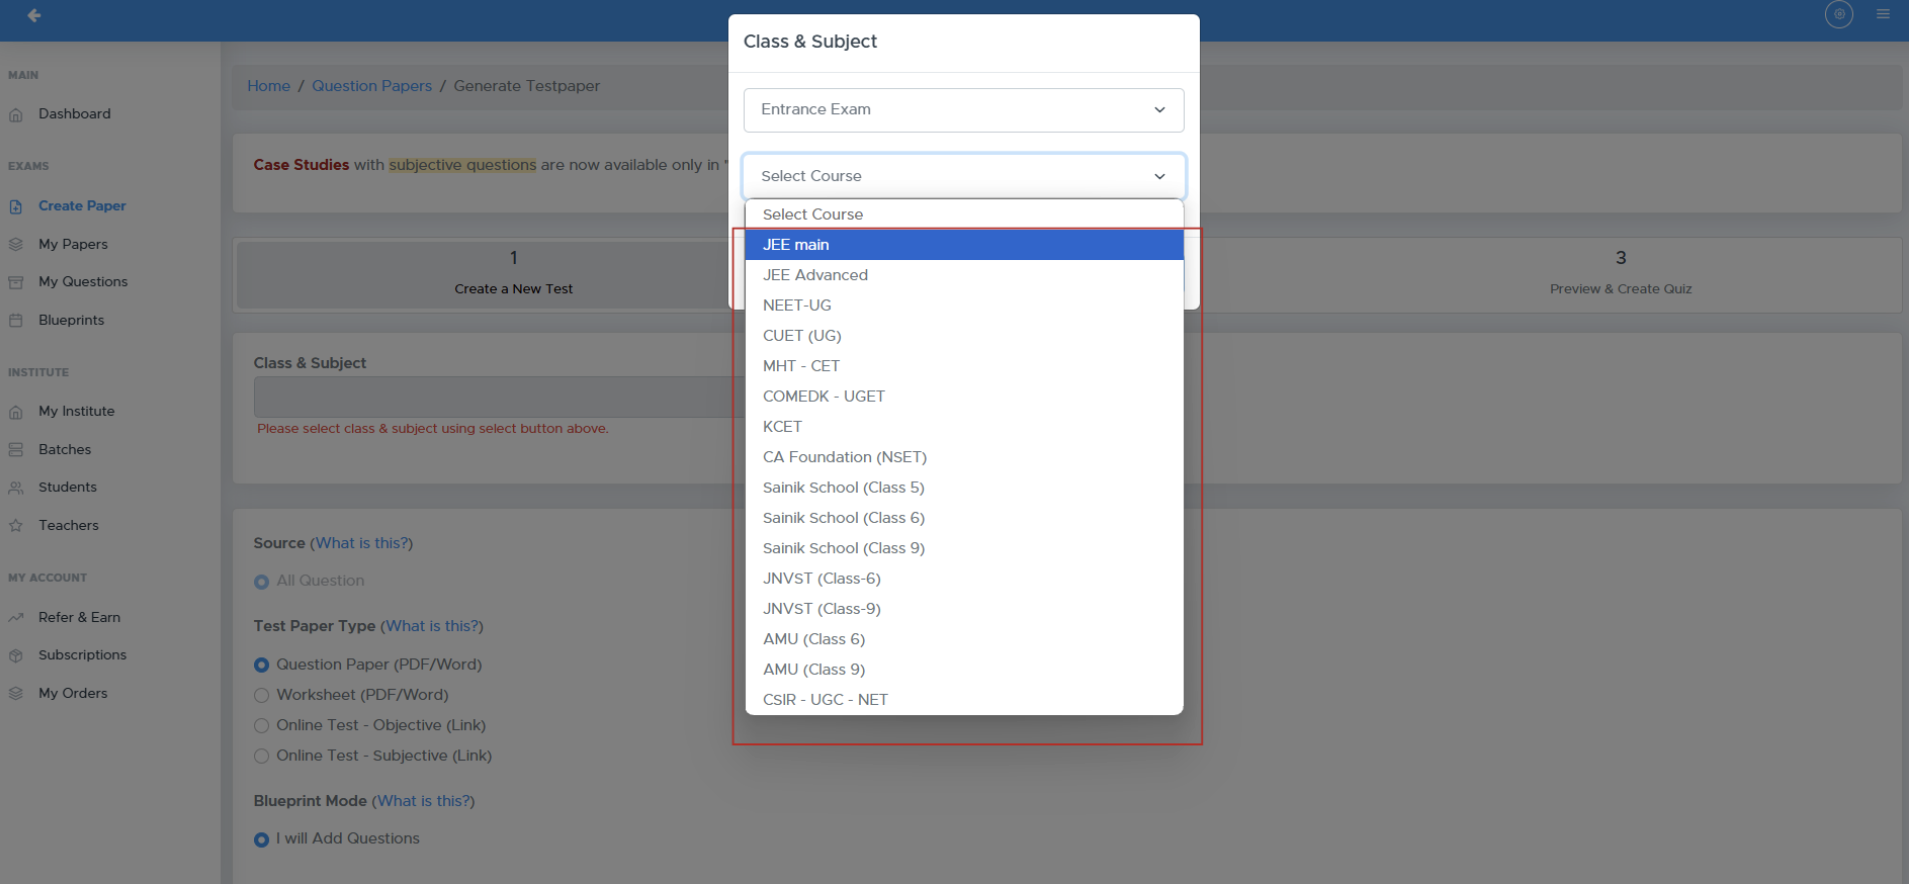
Step 3: Specify Course and Subject
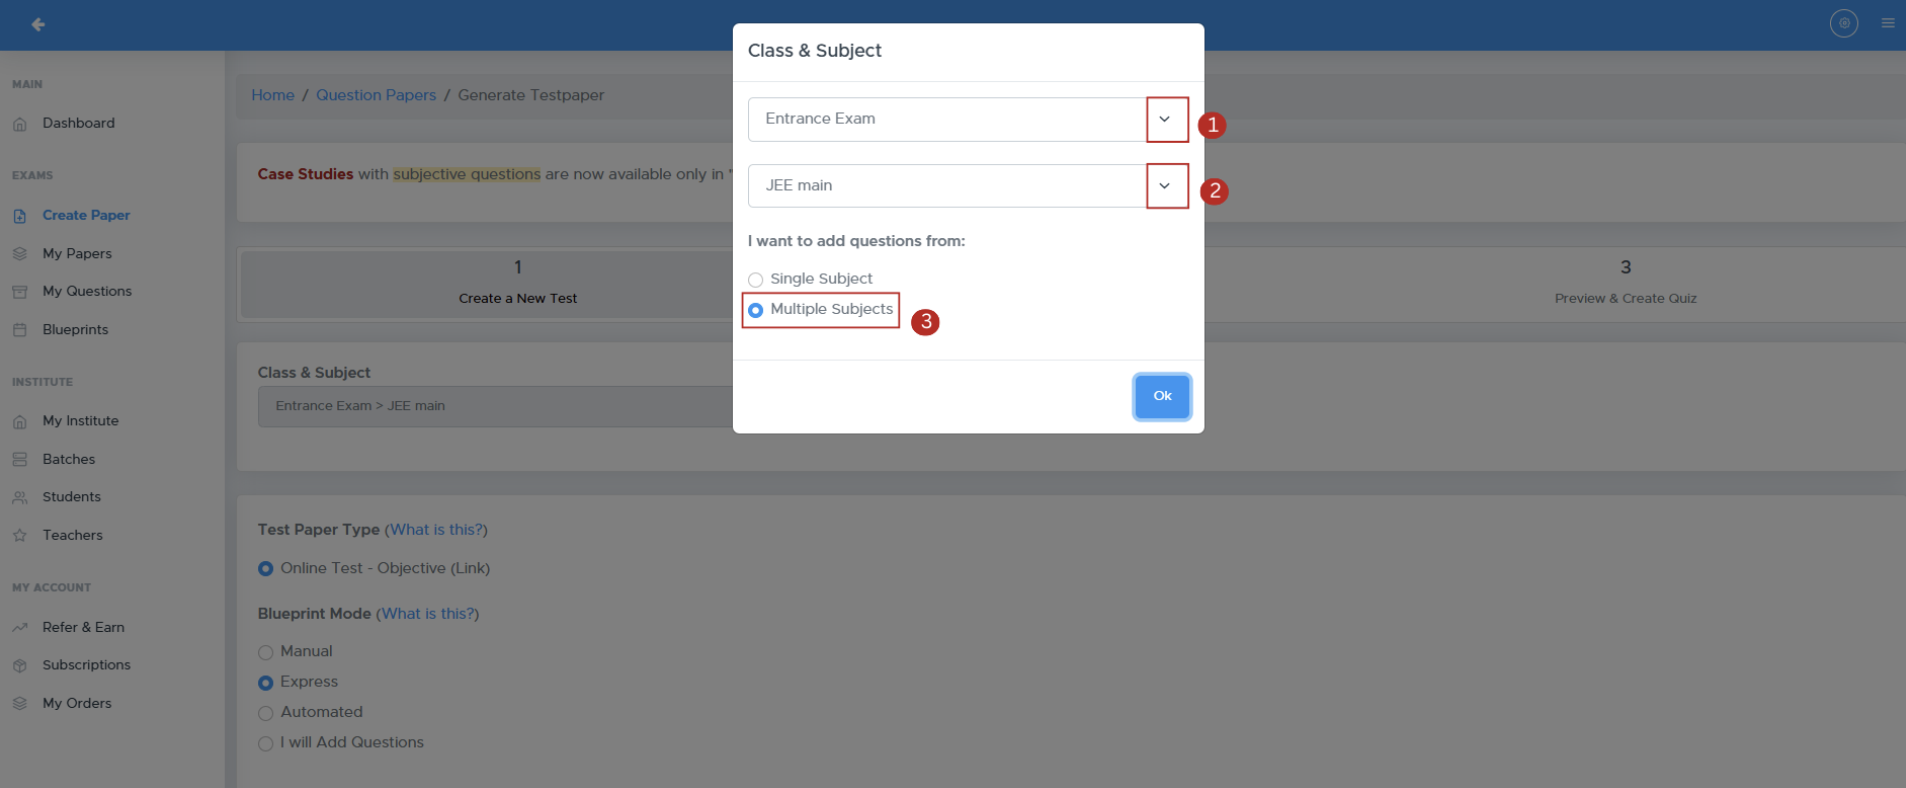
- Module Selection: Navigate to the module selection dropdown and choose Entrance Exam.
- Select Course: From the course options, select JEE Main to specify the target exam.
- Select Single Subject or Multiple Subjects:
- Choose Single Subject to generate a paper for one subject (e.g., Physics).
-
Choose Multiple Subjects to include multiple subjects in your test paper.
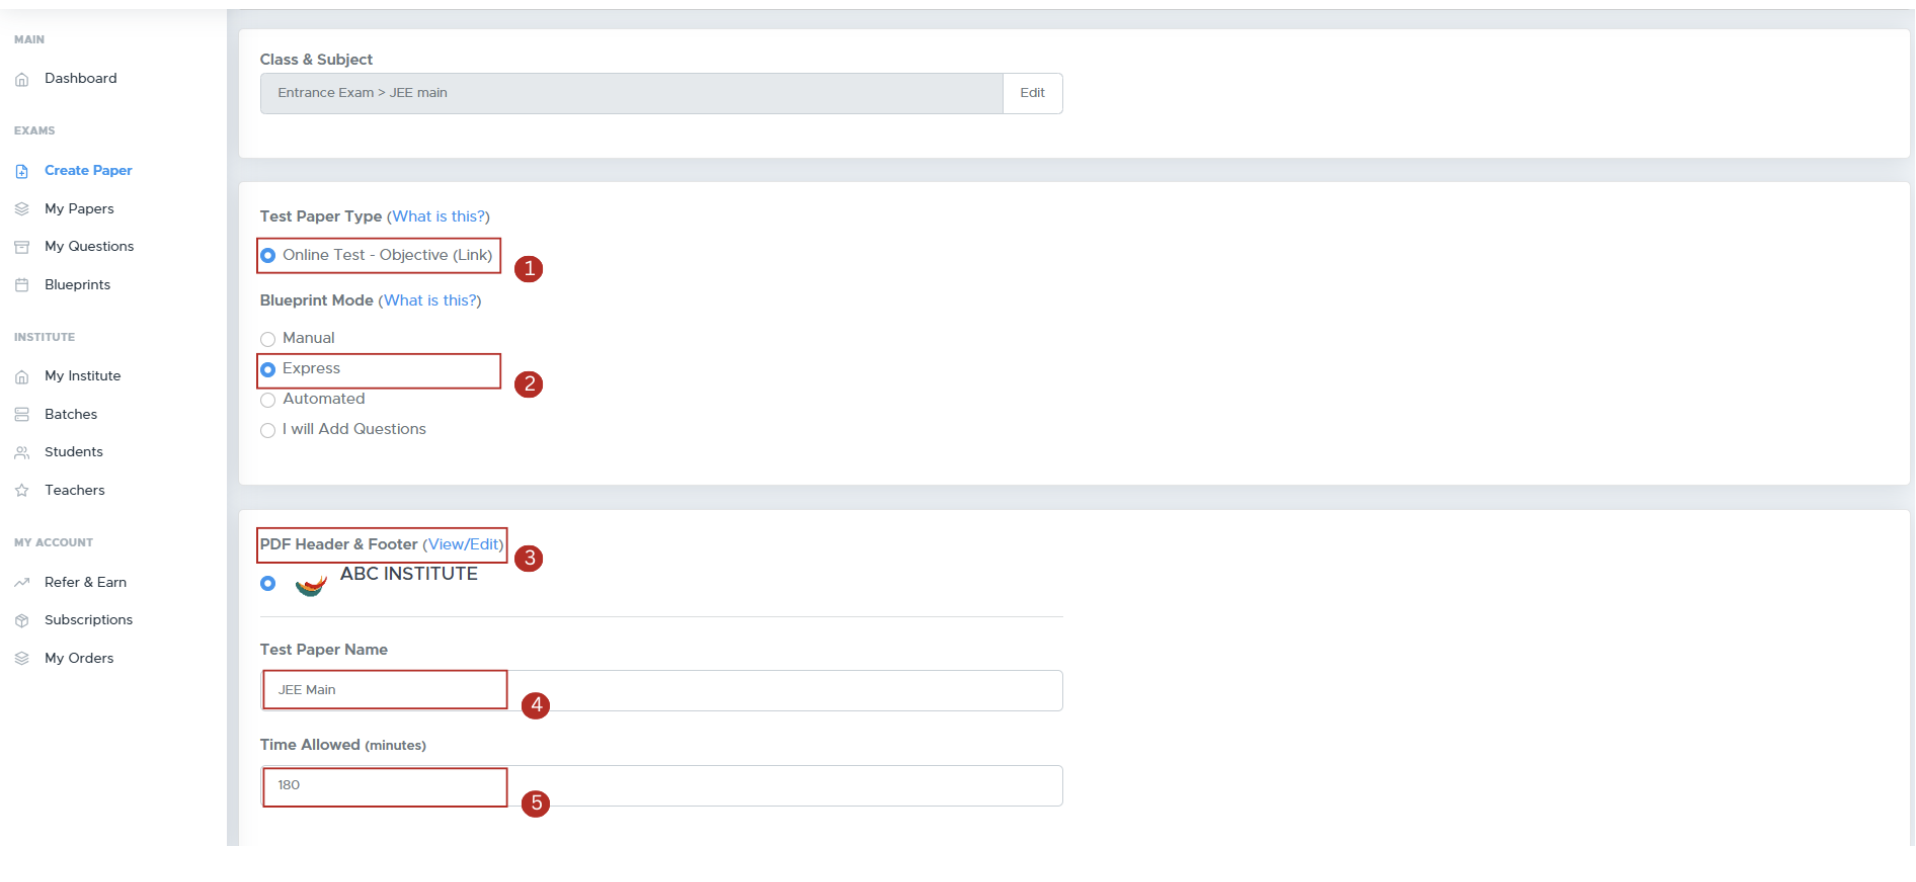
Step 4: Configure Test Paper Details
- Test Paper Type: Decide the format (Question Paper, Worksheet, etc.).
- Blueprint Mode: Select how to structure your test.
- PDF Header and Footer: Select your logo and header/footer text.
- Test Paper Name: Enter the name for the test paper.
-
Time Allowed: Specify the duration for the test.
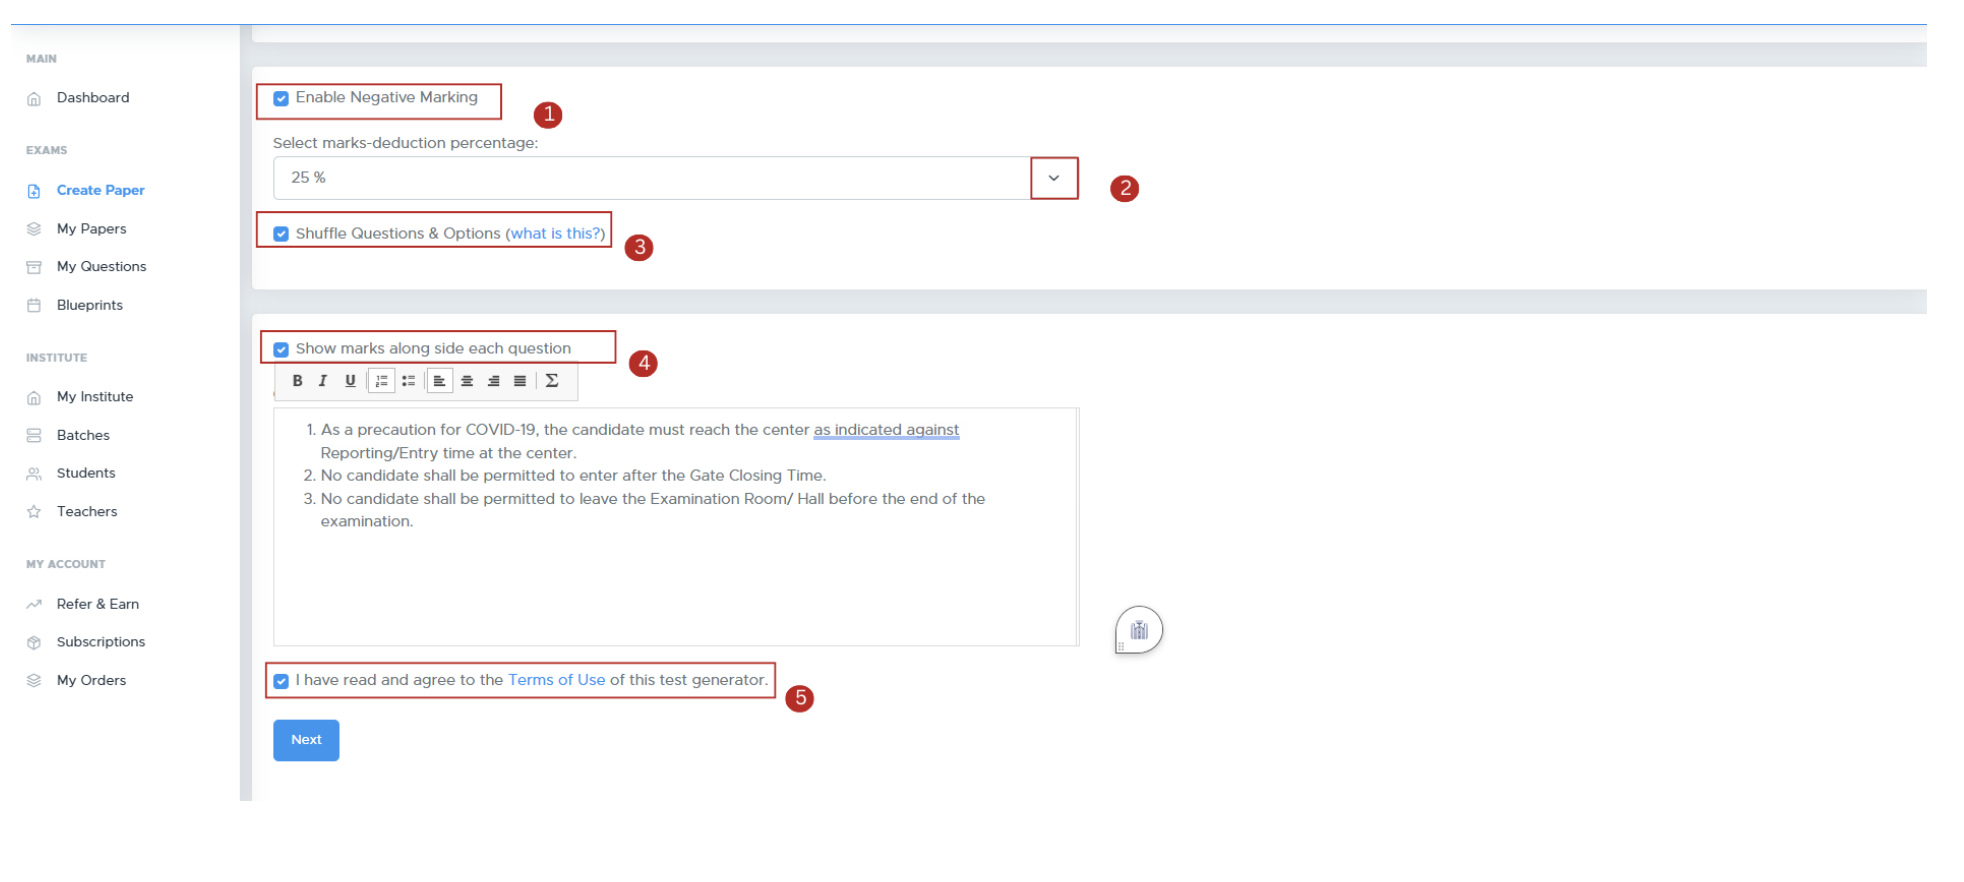
Step 5: Customize Test Paper Settings
- Enable Negative Marking: Tick the Enable Negative Marking checkbox to apply penalties for wrong answers.
- Specify Negative Marking Percentage: Enter the percentage to subtract from the original marks for each incorrect answer. E.g. for 1 mark question, 25% with deduct .25 marks for incorrect answer.
- Shuffle Questions & Options: Tick “Shuffle Questions & Options” to randomize the order of questions and answer options.
-
Specify additional settings:
- Show marks alongside each question.
- Add general instructions.
-
Accept the Terms of Use checkbox and proceed by clicking Next.
Step 6: Add Questions
-
Select Chapters and Questions: Choose chapters and the types of questions to include by clicking subject-wise tabs.
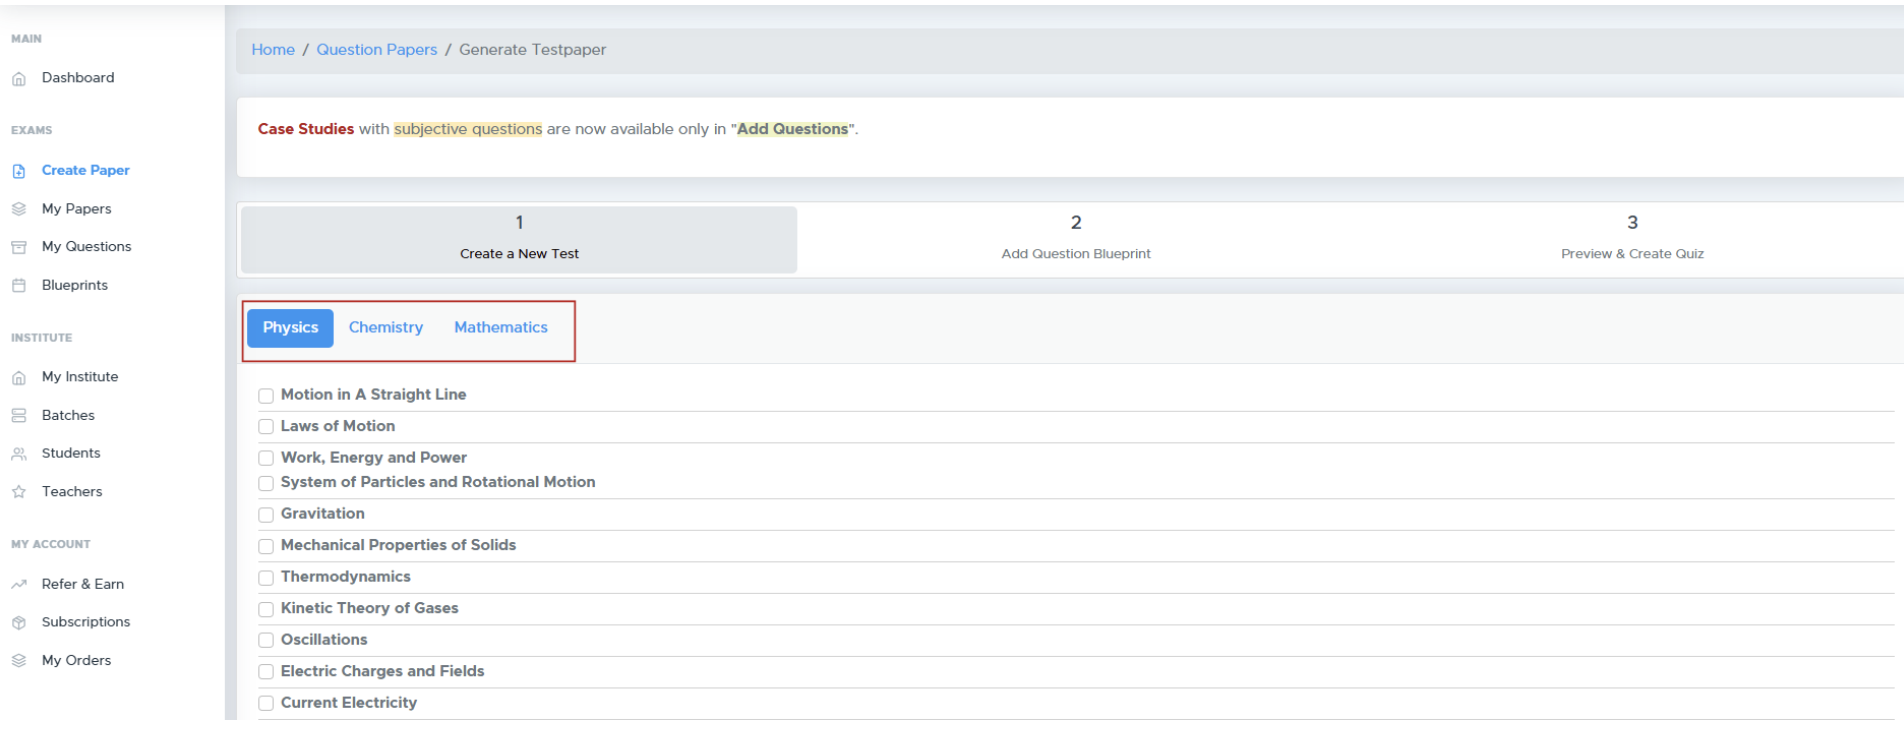
-
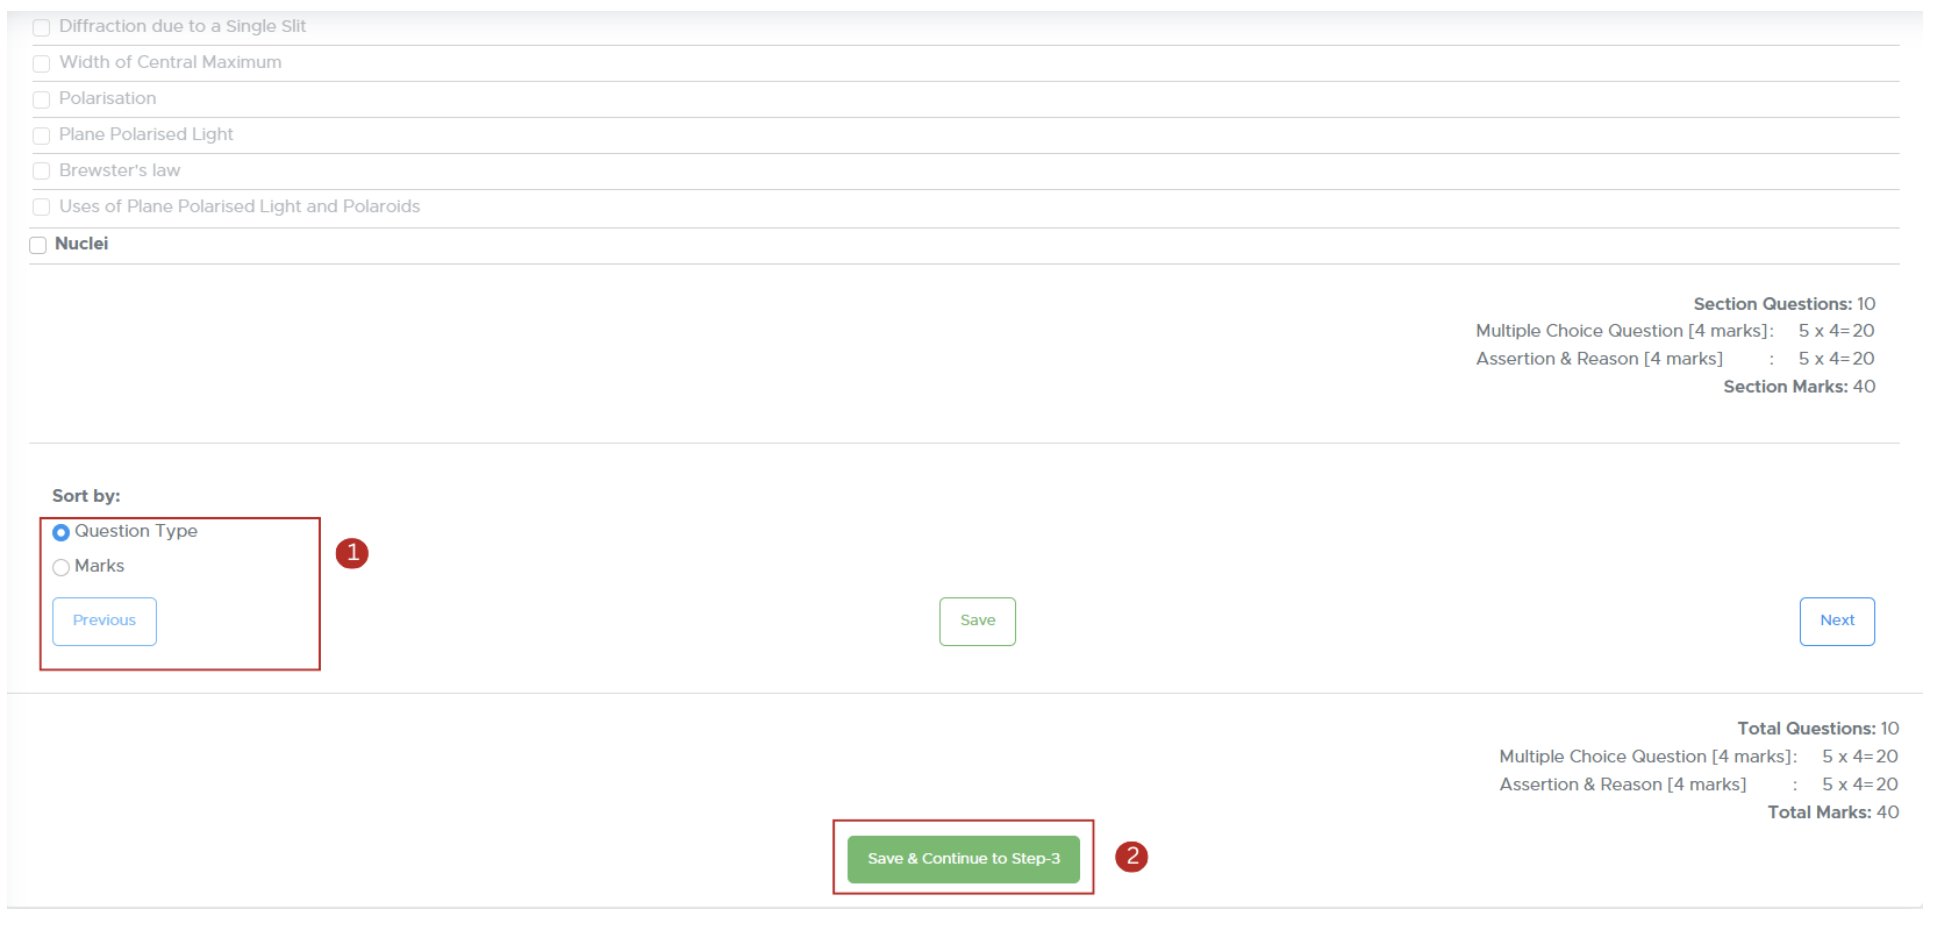
Sorting Options: Decide how questions will be sorted (Question Type or Marks.)
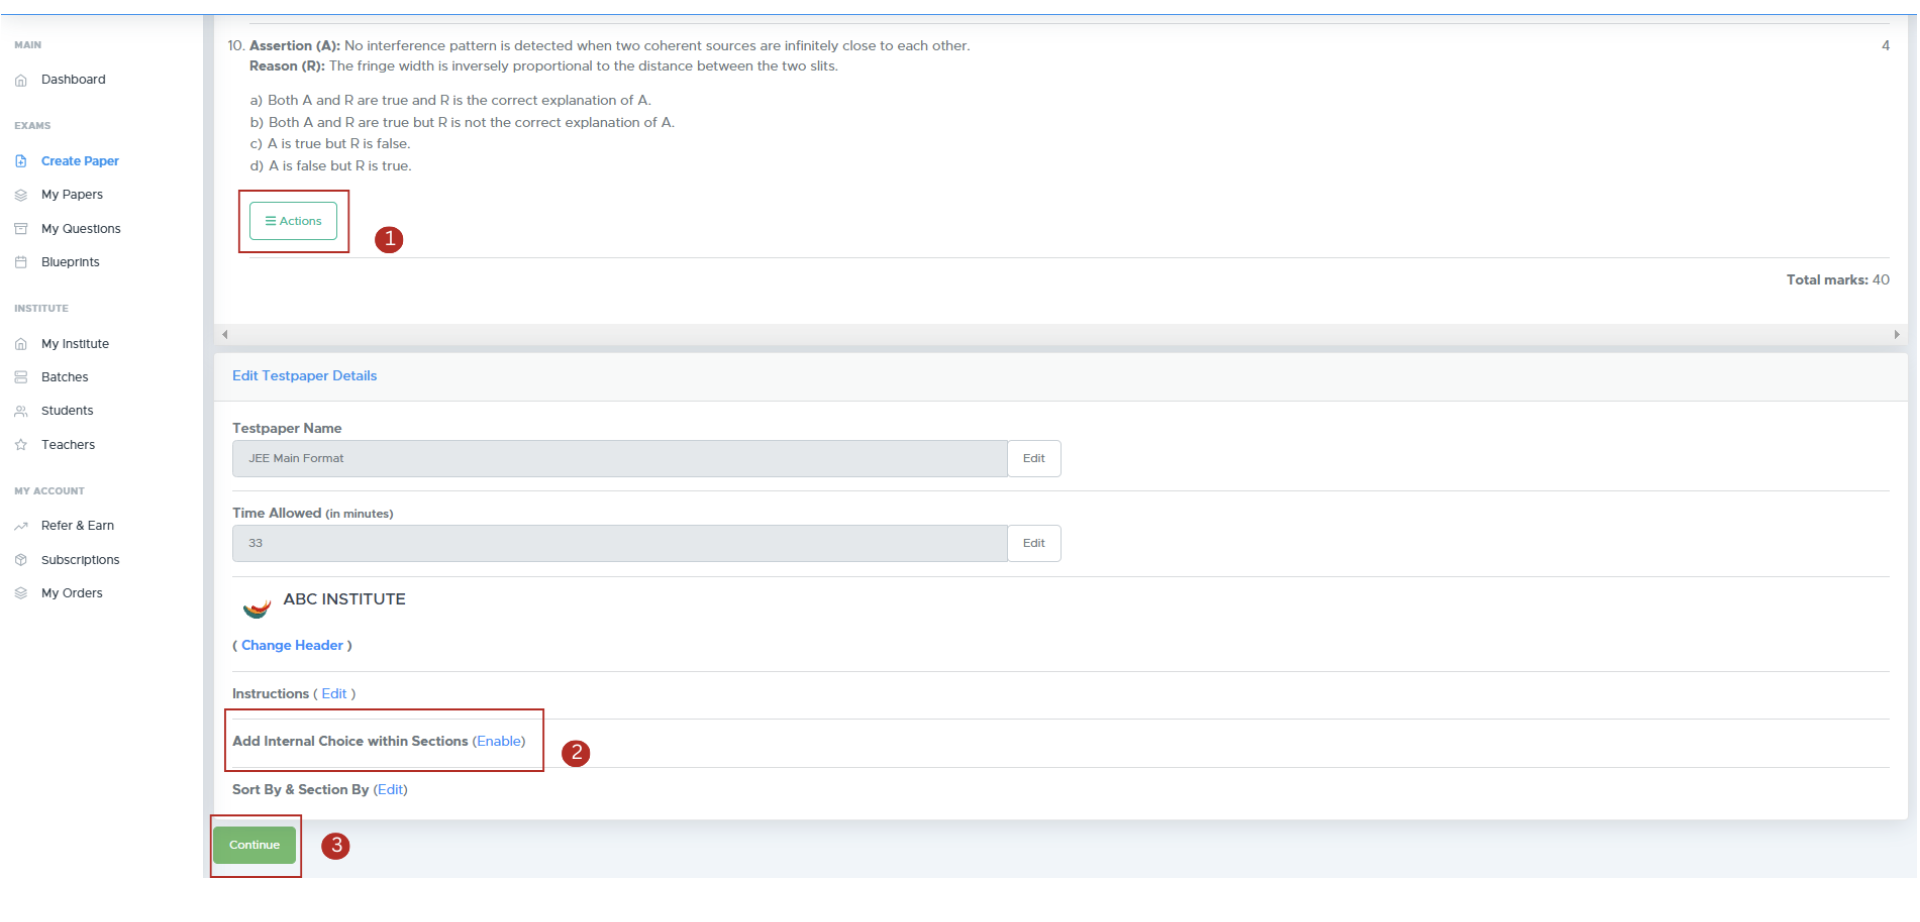
Step 7: Final Review
Click on Refresh to proceed.- Use the Actions button to replace or reorder questions.
- If you want to include internal choices within a section, Tick the checkbox labeled “Add Internal Choice Within Sections”
-
Click on “Continue” to proceed.
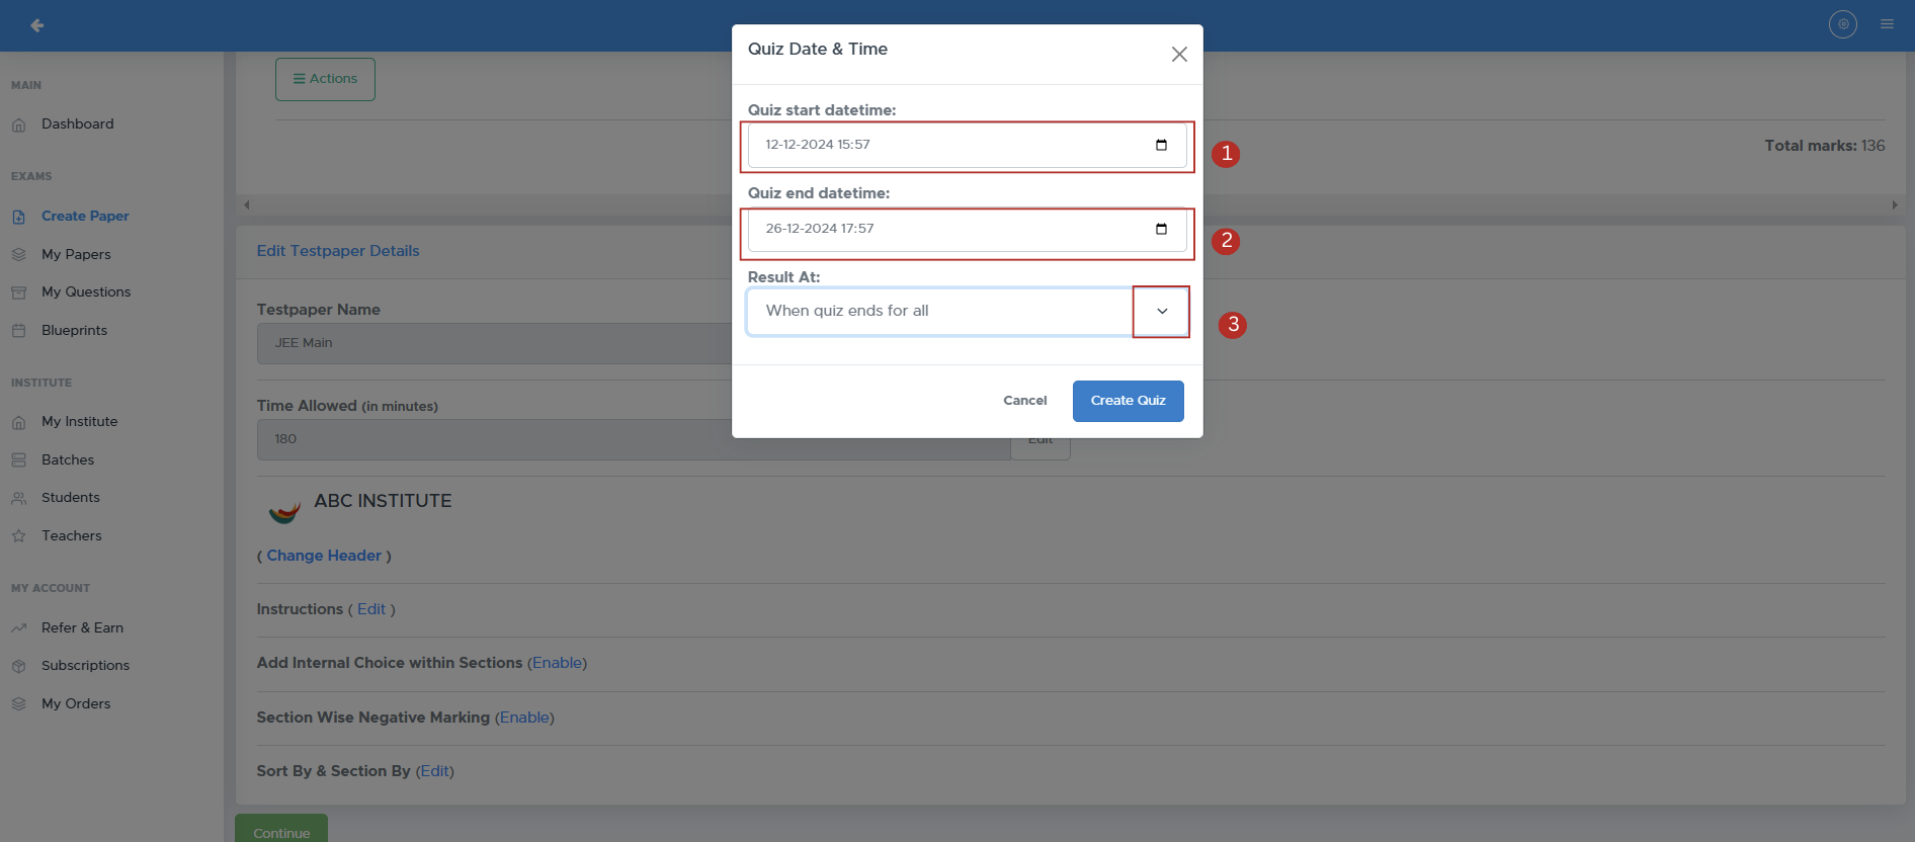
Step 8: Quiz Scheduling Settings
A pop-up window allows the user to configure quiz scheduling settings.- Quiz Start Datetime: Field to specify the starting date and time of the quiz.
- Quiz End Datetime: Field to specify the ending date and time of the quiz.
-
Result At: A dropdown menu to select when the quiz results should be displayed.
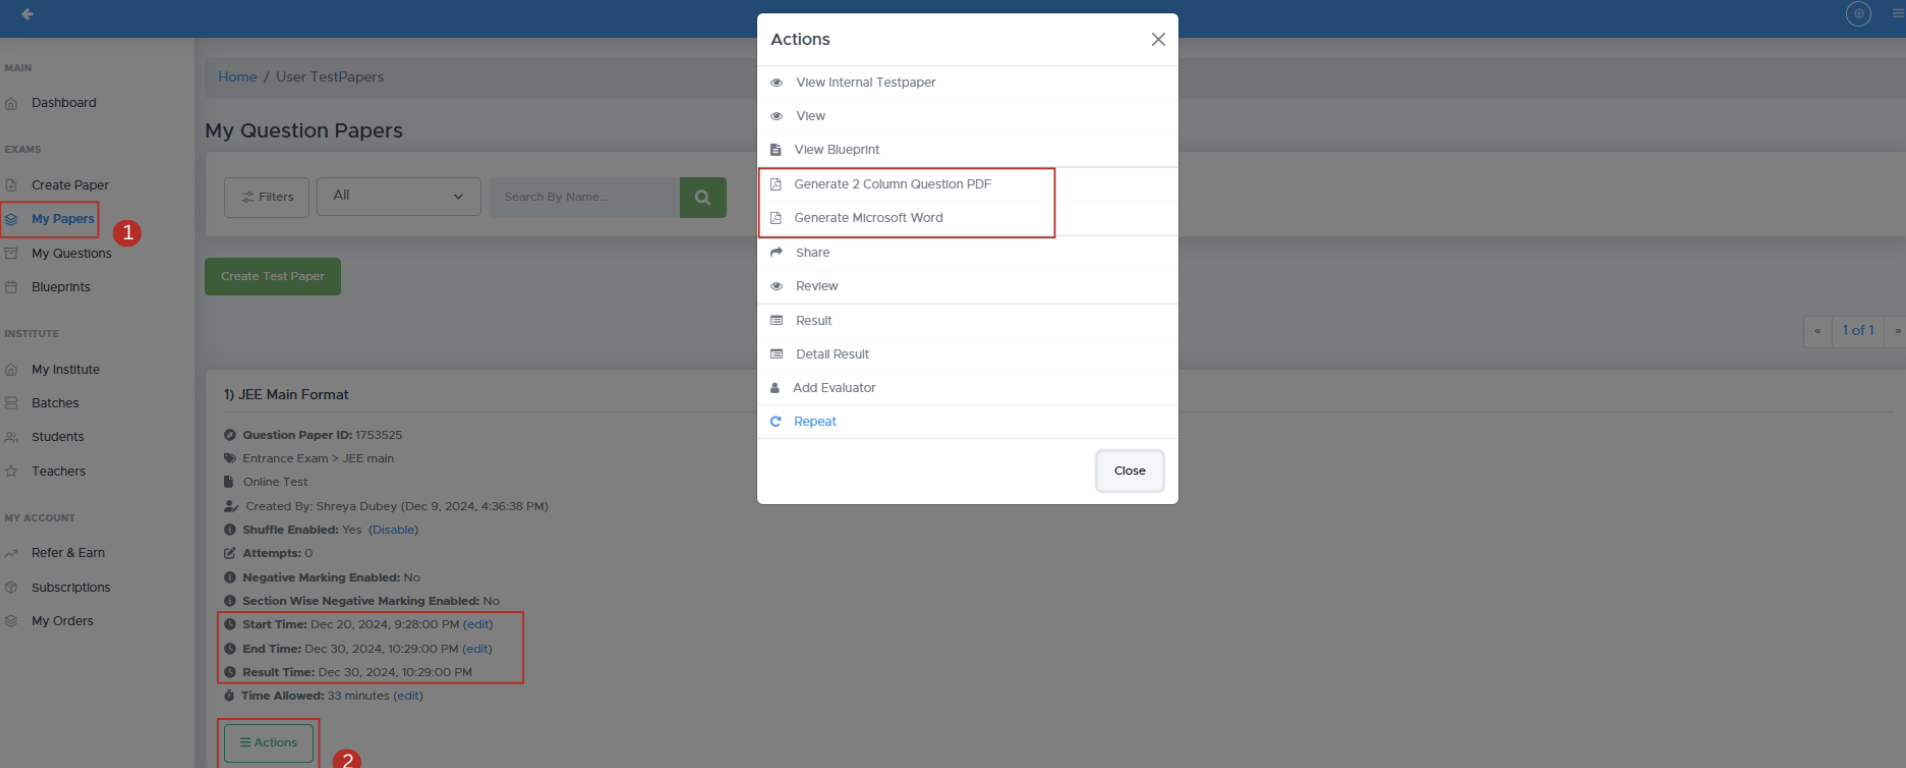
Step 9: Download Your Test Paper
- Access Your Paper: After generation, you’ll be directed to the ‘My Paper’ page.
- Download Format: Click the Actions button to download as .doc (Word) or 2 column pdf.
-
You can modify the quiz start date, end date, result date, and time allowed by clicking the Edit option beside each respective field.
-
You can modify the quiz start date, end date, result date, and time allowed by clicking the Edit option beside each respective field.
FAQs
1. What formats are supported for the logo?
Supported formats include .jpg and .png.2. Can I edit the test paper after generating it?
Yes, you can make changes and regenerate the paper.3. How do I contact customer support?
You can reach support via the app or email at [email protected]4. Is there a limit to the number of questions I can add?
No, you can add as many questions as needed based on the selected format.5. Can I create papers for competitive exams?
Yes, Examin8 supports papers for various competitive exams.Contact Support
For assistance, please reach out to our support team:- Email: [email protected]
- Phone: +91-9213522769, +91-8448425258